A good AI storyboard makes the story understandable before you spend time generating video. It shows who is in the scene, what changes between shots and why the next image belongs after the previous one. Four attractive pictures are not enough if the person, room or action changes without explanation.
For a creator video, start with the smallest complete story you can tell. Below, a fictional creator reaches the door, remembers an empty reusable tote, picks it up and leaves. That ordinary sequence gives each frame a specific job. You can download the images and planning files, then replace the example with your own script.
Choose the output you need before choosing a tool
A storyboard, an animatic and a finished video answer different questions. The storyboard tests the sequence and composition. An animatic plays still frames for provisional durations, often with a draft voice track. Finished clips test whether the intended movement actually works. Keep these stages clear when reviewing a tool or sending work to a client.
| Output | What you can review | What still needs proof |
|---|---|---|
| Script breakdown | Ordered actions and spoken lines | How each action looks |
| Illustrated storyboard | Framing, identity and visual sequence | Movement and final timing |
| Animatic | Pacing against a measured draft voice track | Generated motion quality |
| Finished clips | Action, camera movement and continuity | Final edit, captions and delivery |
This page is a worked planning guide with downloadable resources. The example frames are original AI-generated stills; they are not footage rendered in Clout or a benchmark of a video model. Use them to understand the planning decisions, then test your actual clips separately.
Turn a short script into visible beats
Write the action in plain language before describing the camera. Our original scene is: a creator is about to leave home, notices the shopping tote on a chair, retrieves it and exits with the bag. The narration draft is: “I was already at the door when I remembered the bag. One little detour, and I was ready to go.”
Split whenever the viewer needs new visual information. Reaching the door establishes the goal. Looking back introduces the interruption. Picking up the tote resolves the problem. Leaving supplies the ending. A sentence can need several shots, while two spoken sentences can share one uninterrupted shot.
Assign provisional durations only after the beats are clear. Our four-shot plan totals 18 seconds: 4, 4, 5 and 5 seconds. That is an editorial timing draft, not a measured voice recording. Read or record your narration, measure it, then revise the holds rather than stretching a fast action to fit an arbitrary number.
Four frames for the forgotten tote
The visual anchors are one fictional adult creator, a cream jacket over a navy shirt, charcoal trousers, a wooden apartment door and an empty teal tote on a wooden chair. The images keep a 3:2 landscape composition. They preview the intended action at each beat; the final video should be generated and reviewed at your chosen delivery ratio.
| Shot | Draft hold | Framing | One intended action |
|---|---|---|---|
| Doorway setup | 4 seconds | Medium side view | Reach for the handle |
| Remembering | 4 seconds | Medium reaction | Look back toward the tote |
| Pickup | 5 seconds | Close view | Grip the handles and lift |
| Exit | 5 seconds | Wider doorway view | Leave carrying the bag |
Establish the creator at the door
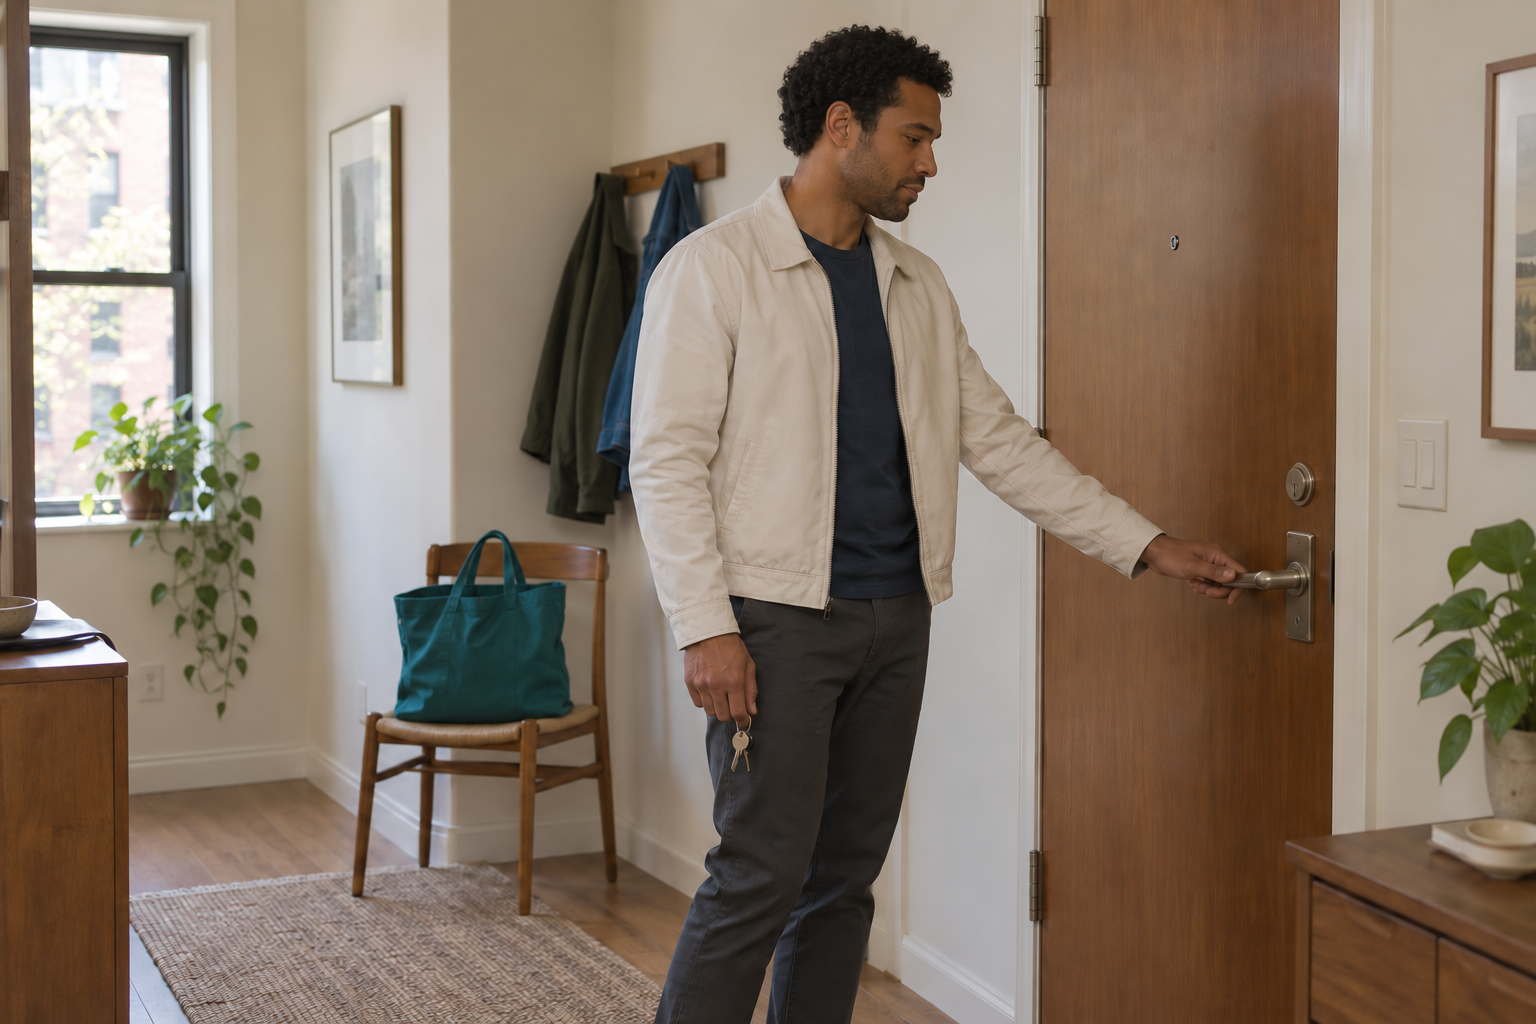
Shot 1 establishes the exit goal and shows the forgotten bag in the same room
Download this storyboard frameThe first frame needs both the creator's goal and the object that will matter next. Keep the tote visible without making it the only subject. One hand reaches for the handle and the other holds the keys. A simple fixed camera leaves room for the viewer to understand the geography.
Show the moment of remembering
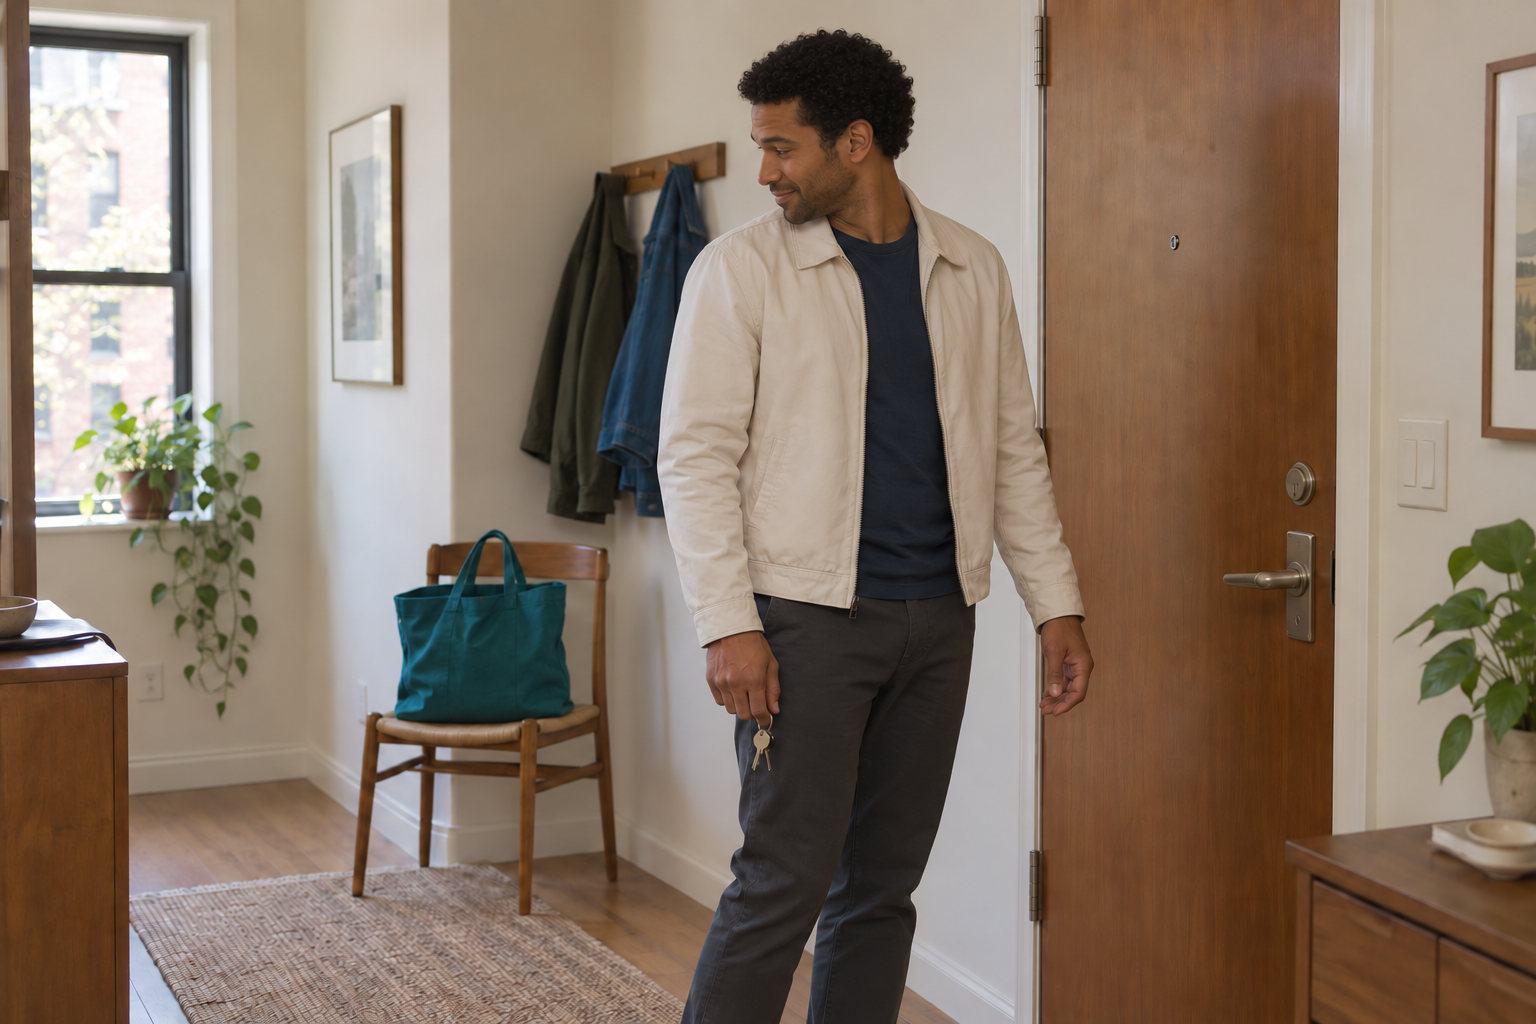
Shot 2 changes the creator's attention while retaining the door chair wardrobe and keys
Download this storyboard frameThe reaction is a small turn, not a different scene. Preserve the door and chair positions so the look has a clear destination. Check that the creator still has the keys and that the empty bag has not suddenly acquired groceries. A slightly amused expression fits the ordinary mistake better than a dramatic surprise.
Make the pickup easy to read
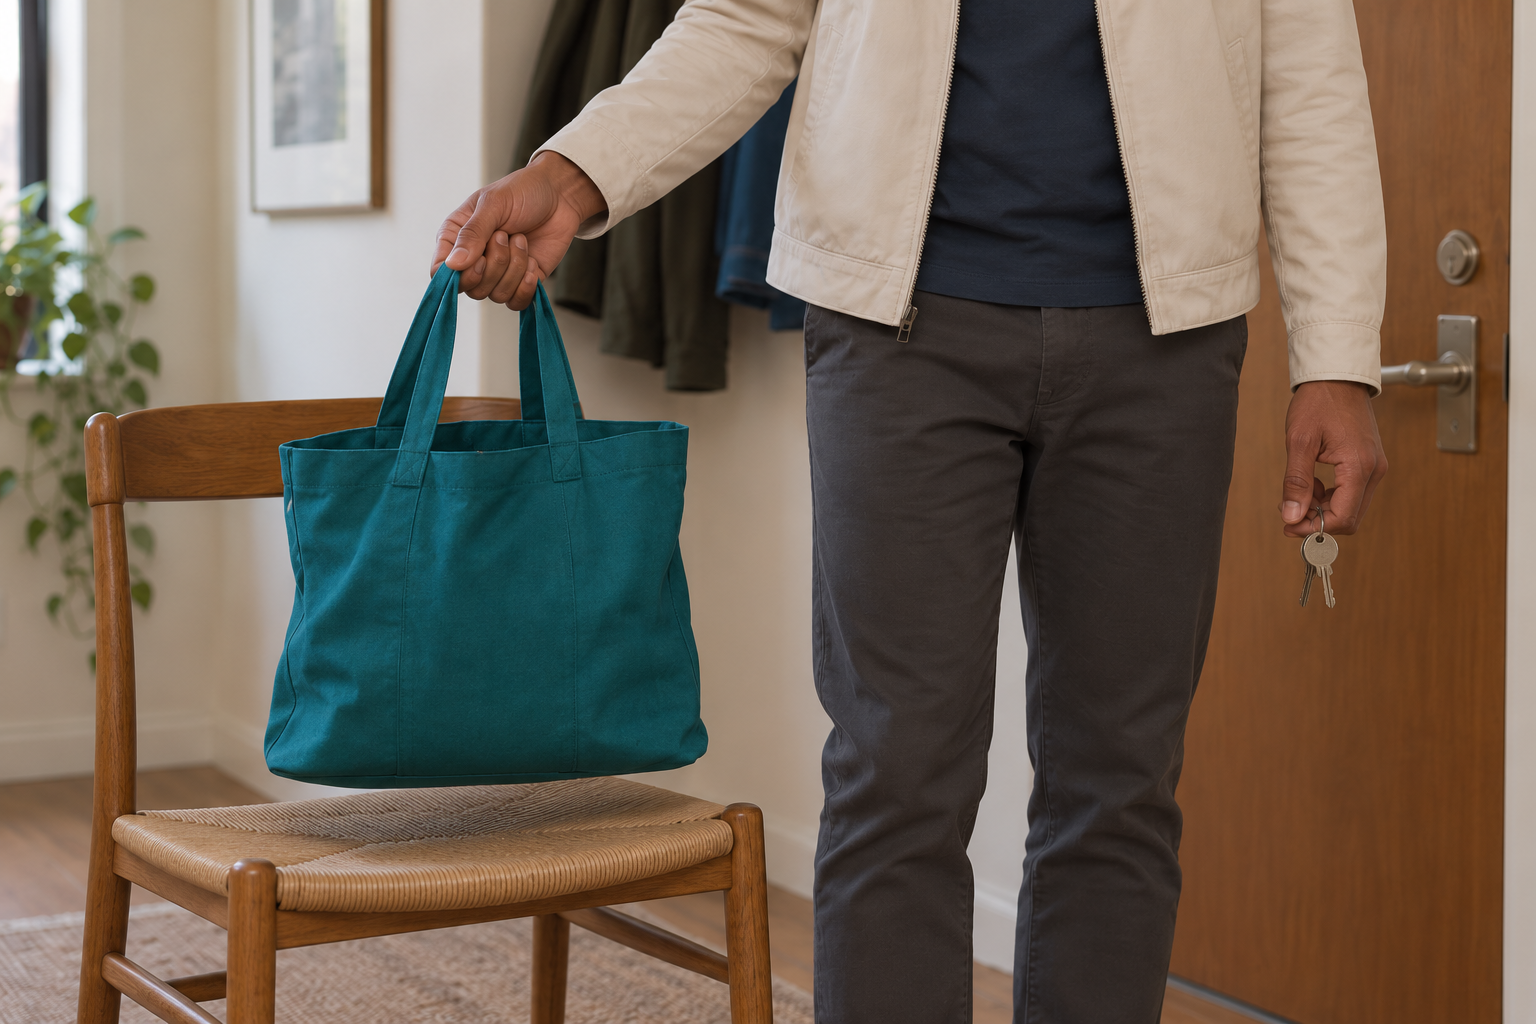
Shot 3 isolates the hand grip and empty tote instead of crowding several actions into one frame
Download this storyboard frameA closer view can reduce the number of things the next clip must do. Concentrate on one coherent grip and a short lift. The bag handles should connect naturally to the fabric, and the fingers should remain distinguishable. Avoid asking this shot to include a turn, a walk and a door opening at the same time.
In this board, the keys change hands between the reaction and pickup. Plan that transfer before the lift, or keep the keys in one hand throughout your own sequence. The action notes should explain changes that a still frame cannot show.
End with the bag visibly carried
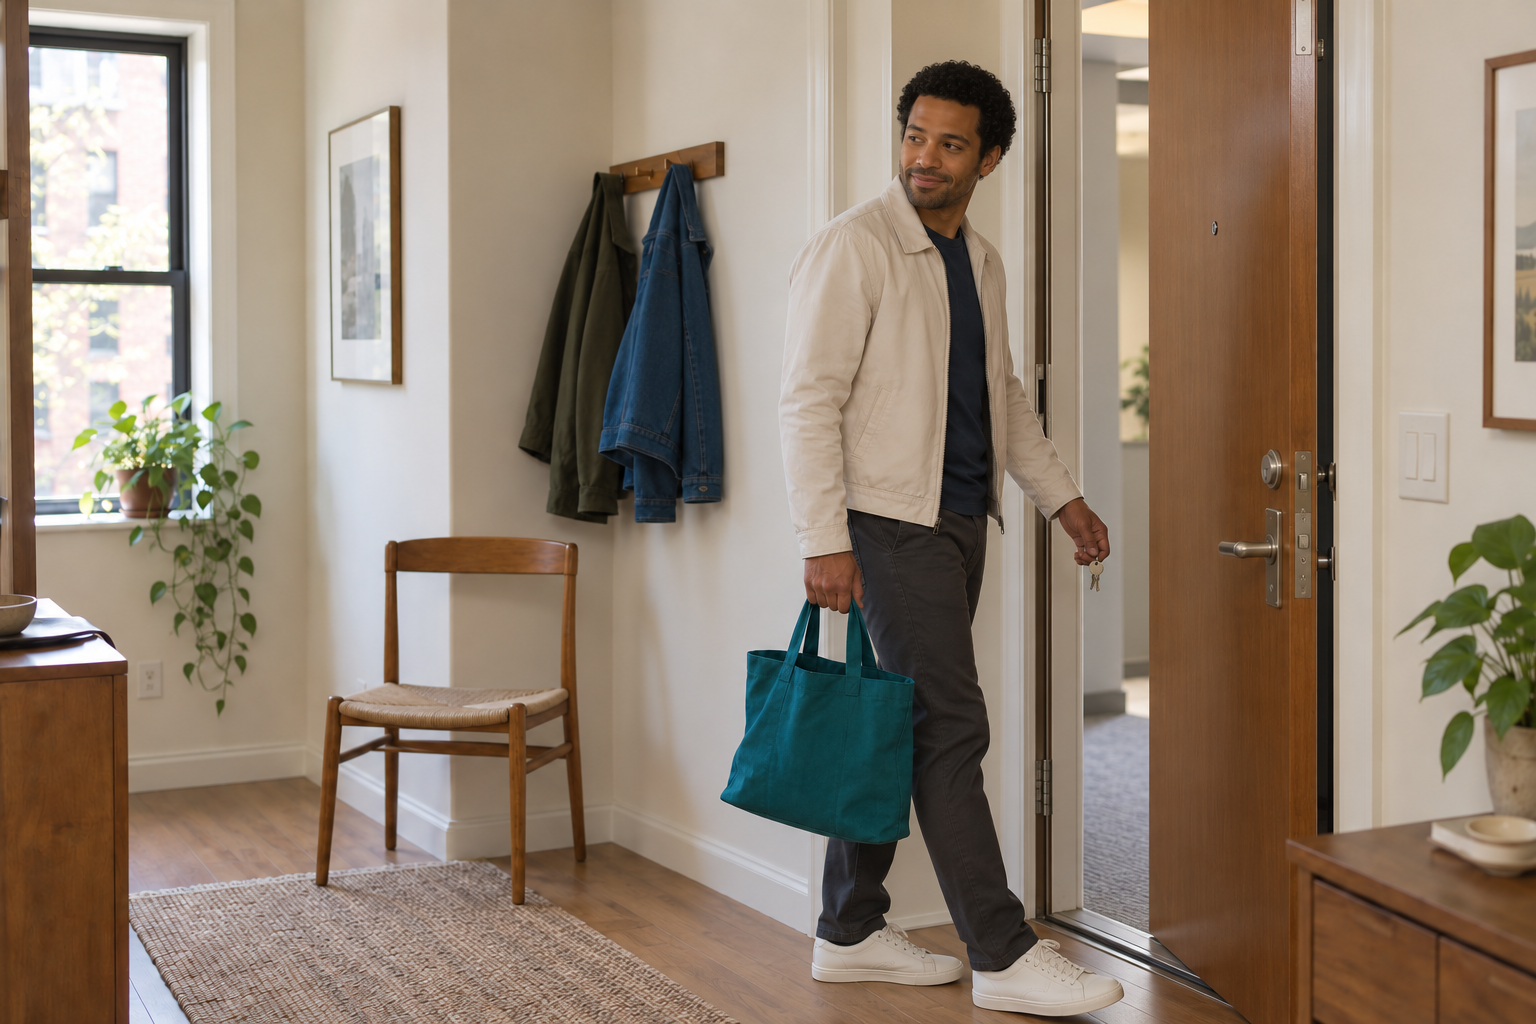
Shot 4 resolves the story by showing the remembered bag with the creator at the exit
Download this storyboard frameFinish with the changed state: the tote is now carried rather than left behind. Keep the wardrobe and doorway recognizable. The wider framing gives the final action room. The board shows the intended ending, but you still need to verify that a generated exit clip preserves the bag and does not distort the door or hands.
Download and adapt the storyboard files
Download the editable four-shot CSV plan or download the blank editable SVG storyboard. The CSV contains ordered shot purposes, provisional durations, framing, continuity anchors and motion notes. Your asset and review columns are blank so you can track the files you actually produce.
Open the CSV in a spreadsheet and replace the example action first. Add or remove rows until every shot has a useful purpose. Open the SVG in a vector editor to place your own images and notes inside the four blank panels. These downloads work without an account; they are planning resources rather than a free AI image generator.
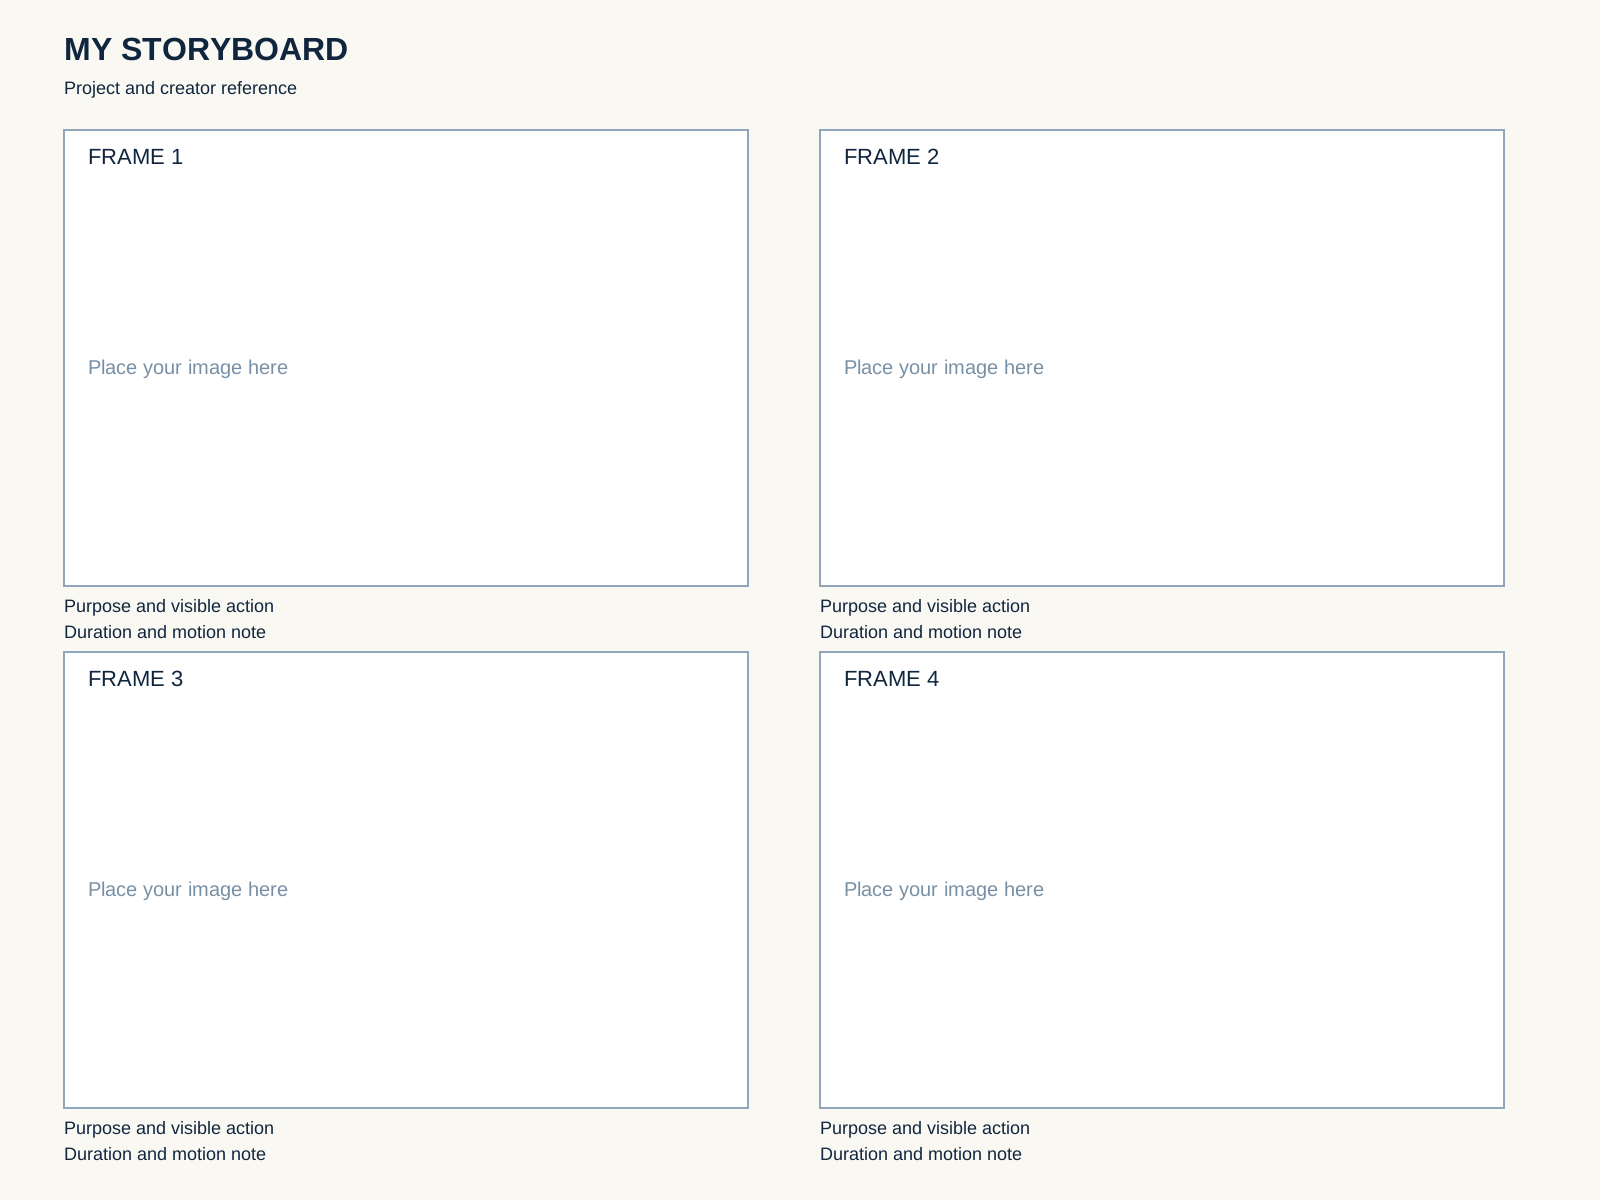
The blank board reserves a 3:2 panel and editable notes for each of four shots
Download the blank storyboard templateFor a vertical reel, change the frame design before generating final assets. A landscape board can communicate the story, but it does not prove that a face, hand or object will fit in a narrow crop. Reframe for the actual format and reserve a clear area for centered captions. Review that safe area on a phone before approving the final edit.
Write a prompt that separates continuity from action
A reusable shot prompt has two parts. The continuity brief stays the same across the sequence: identity, wardrobe, props, location and light. The shot instruction changes: action, camera distance and intended direction. Reference your approved creator image whenever the image tool supports that workflow.
Use the same adult creator with short curly black hair, cream jacket, navy shirt and charcoal trousers. Preserve the wooden apartment door on the right, the empty teal tote on the chair to the left and soft window light. Show the creator turning back toward the tote with a small remembering expression. Medium view, complete face and visible hands, one coherent action, no collage or text.
Replace broad directions such as “make it cinematic” with the information the shot needs. “Medium reaction, closed door, gaze toward the tote” is easier to review. If a frame changes a key detail, revise that frame before using it as a reference for the next one; otherwise the error becomes part of the sequence.
Use AI storyboarding tools for the stage they support
Boords documents script import, AI writing and blank-board starting methods, with character references and frame dimensions in the setup. Its script conversion documentation separates ordered editable frame structure from image generation. That distinction is useful when choosing whether you need script organization, illustration or both.
Higgsfield's storyboard page describes optional image references and per-scene prompts for framing, motion and mood. It also documents a route from planned keyframes to video generation. These are documented workflows, not a hands-on comparison of output consistency.
If the central requirement is a recognizable creator across photos and videos, create your character in Clout, then organize the planned scenes around that identity. Keep your shot plan beside the generated assets so the character stays connected to the story. Choose a separate board editor when you need editable panels, collaborative comments or a specific presentation export.
Review the board before generating motion
| Review | Question to ask | Example failure |
|---|---|---|
| Identity | Would the viewer recognize the same person | Hairline or facial structure changes |
| Geography | Do the look and next action connect | Door and chair switch sides |
| Props | Does the object retain its state | Empty tote becomes a grocery-filled bag |
| Hands | Is the intended grip understandable | Fingers merge with a handle |
| Sequence | Does each frame add new information | Two repeated doorway portraits |
| Delivery crop | Will key action and captions fit | The hand disappears in a vertical crop |
Read the images in order without narration. Someone should understand the missing bag and its retrieval. Then read the script against the board. If the narration explains an action the pictures never show, add the missing visual information or simplify the line.
Once the board is approved, generate one simple action per clip. Compare the first and last frame of each clip with its neighbors, and check the actual duration against the recorded audio. Add captions in the edit so spelling, line breaks and center placement remain controllable. A storyboard helps identify risks early; the final motion still needs its own review.