

Choose softball images that make the sport legible at the size your audience will see. An equipment close-up can establish the subject quickly, while a field scene can provide context for a creator or story. Decide whether the image needs to show the ball, the glove, the location or an action before writing the prompt. Keep the final caption and crop in mind from the start.
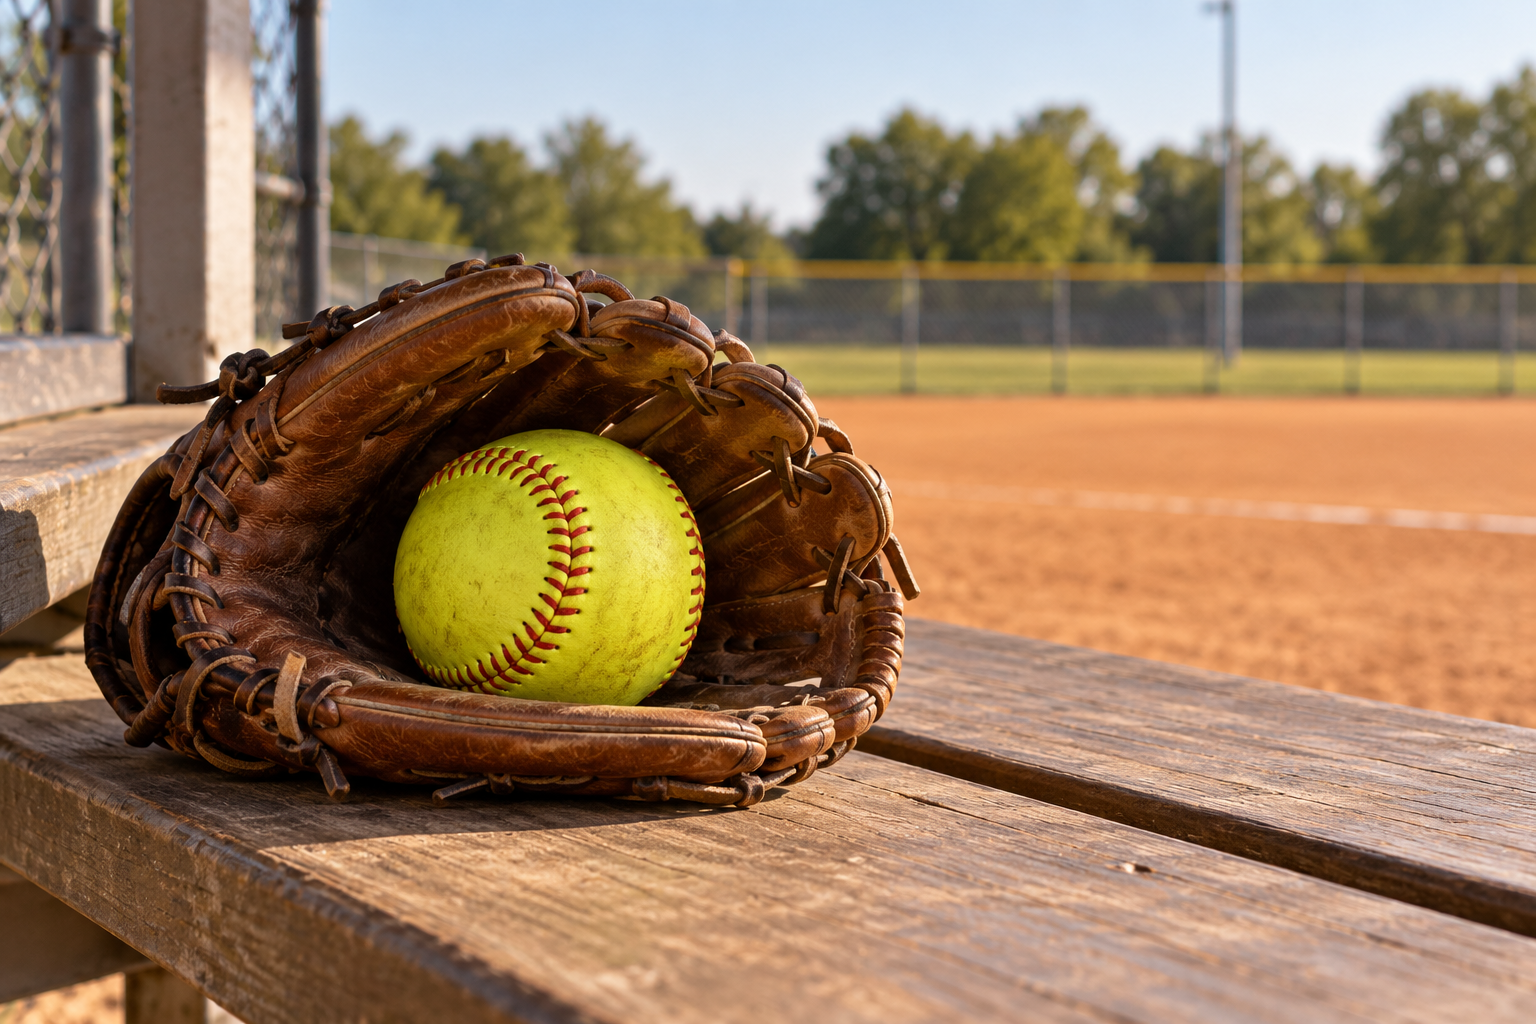
Our realistic original example is a fictional equipment scene: one yellow ball with red stitching rests inside a brown glove on a wooden dugout bench. The principal equipment is sharp, while the field behind it is softly out of focus. It is a generated visual concept, not a photograph of a named team, a branded product or evidence that equipment meets a league specification.
Choose equipment or location as the subject
A close equipment image is useful for a sports-themed cover, a story introduction or a content background. It gives the viewer a clear object to recognize without requiring an entire field to remain visible in a narrow crop. A wide location image serves a different job: it establishes where a story takes place and can reserve space for a creator.
Decide which details carry the meaning. If the glove and ball are the focus, keep them large enough to inspect. If a person is the focus, make the equipment and field support that character rather than compete with them. A decorative sports background can be attractive but fail to communicate the topic when the ball is tiny or cropped out.
Inspect the original equipment concept
The image places the yellow ball in the glove pocket, with red stitching visible around its surface. Leather texture, lacing and the wooden bench are prominent. Warm light and contact shadows help the equipment sit naturally in the scene. A fence and clay-colored field provide context without becoming the primary subject.
The glove and ball remain entirely visible in the main composition, with surrounding space for a layout. That makes the concept useful for an equipment-led story. The glove pocket is interpreted, so inspect it if a specific product matters. The background is fictional and soft; it should not be used to identify a particular venue or demonstrate precise field geometry.
Compare a realistic scene with an editorial illustration
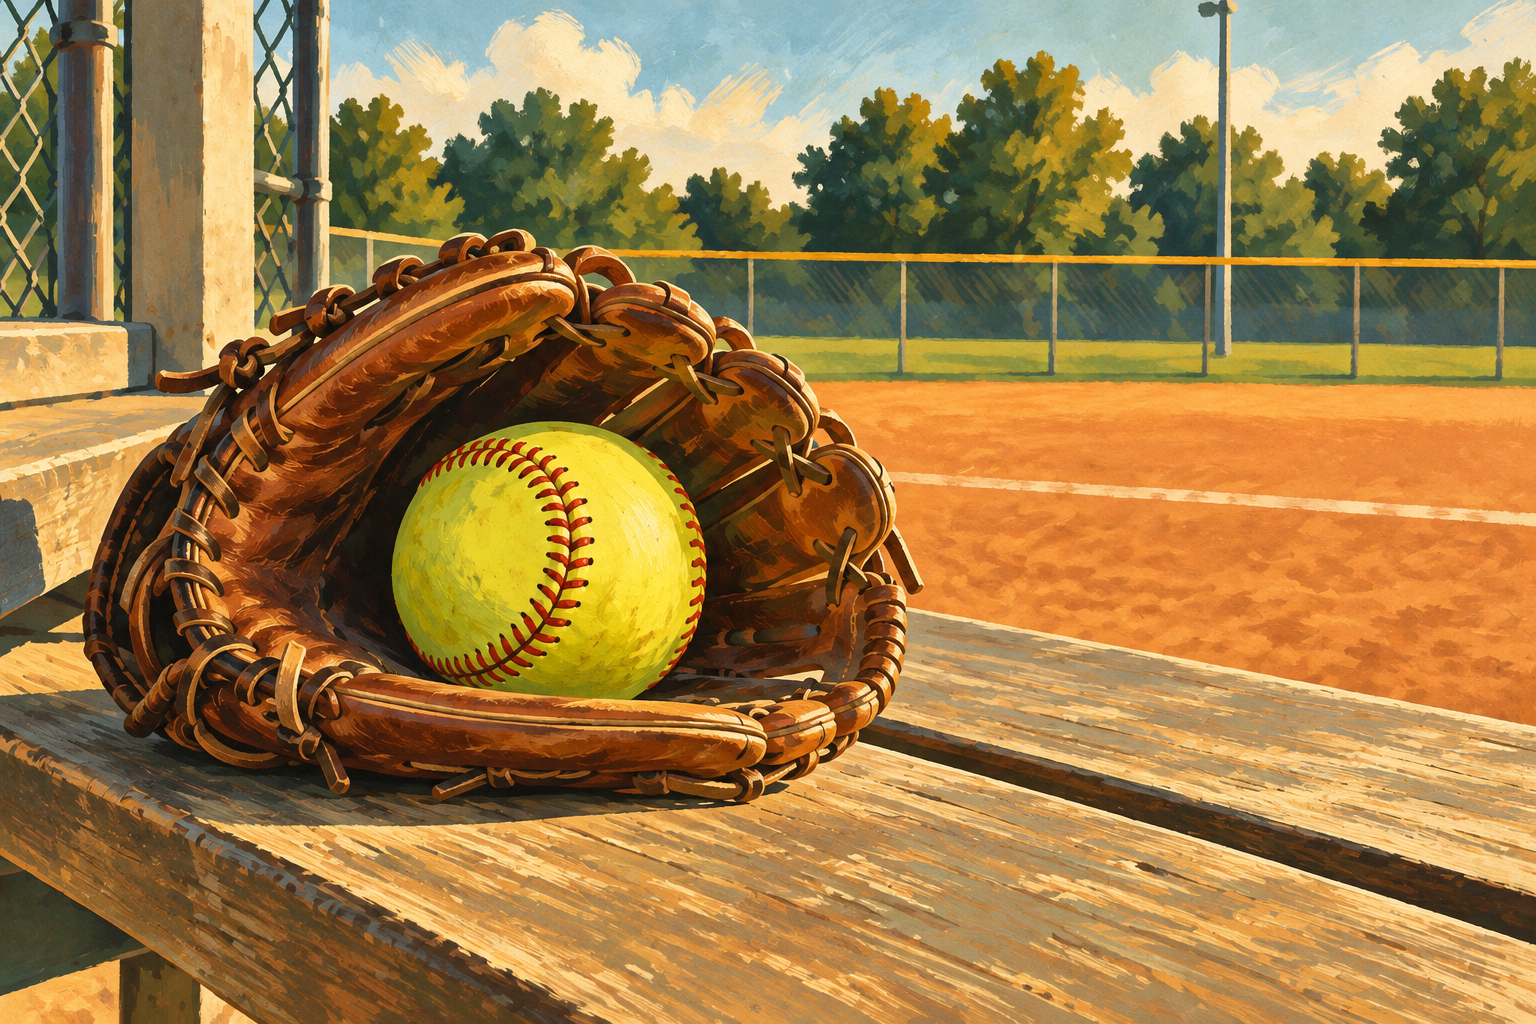
The second original image is a reference-led illustrated version of the equipment scene. The yellow ball and brown glove remain the main subject, while the bench, fence and field are simplified into painted shapes. Warm amber, forest green and cream create a different visual direction from the photograph-style version. The illustration has bold contours and a matte painted texture rather than sharp leather and wood detail.
Choose the realistic direction when natural material texture helps the story. Choose the illustrated direction for an editorial sports post or a graphic campaign. Neither style proves product specifications or a real location. Compare the actual ball outline, stitching, glove pocket and contact in both versions before accepting one for your layout. Save one direction as the campaign baseline instead of switching styles unintentionally between posts.
Download the realistic softball image · Download the illustrated softball image · Download the softball image review sheet
Write a prompt that keeps the equipment coherent
One practical prompt begins with one yellow softball with visible red stitching resting in one brown leather glove on a simple wooden dugout bench. Keep the ball and glove sharp, with a softly blurred fictional field behind them. Ask for natural scale, believable contact shadows and realistic leather texture. Keep the image free of logos, team names, lettering and extra equipment.
Avoid making every possible sports object part of the same scene. Adding bats, helmets, multiple balls, a uniform and a scoreboard can obscure the principal equipment and create more details to review. Start with the object that establishes the story. Add a second prop only when it has a clear role in the content.
One yellow softball with visible red stitching resting inside one brown leather glove on a wooden dugout bench. Show the whole ball and glove with natural scale and believable contact shadows. Warm daylight, realistic leather and wood texture, and a softly blurred fictional field in the background. Leave quiet space beside the equipment for a post layout. No logos, lettering, team names, badges or extra equipment.
Review stitching and contact before accepting the image
Inspect the ball outline and follow the visible stitching across its surface. Look for repeated seams, broken arcs or lettering that the model invented. Check whether the ball sits in the glove rather than floats above it. Review the glove pocket, lacing, finger sections and bench contact at the original download size.
Then inspect the same details at the intended post size. A texture that looks convincing at a small thumbnail can hide an awkward lace or a melted edge in the original. A visually appealing equipment scene also does not establish the actual size, materials or approval status of a purchasable product. Use verified product information when those facts matter.
Plan a crop that keeps the sport visible
For a wide cover, place your text where it leaves the ball and glove legible. For a portrait post, preview the actual frame before deciding where to put the caption. A centered crop can remove useful equipment when the original composition places it away from the center. Choose the crop around the meaningful objects instead of assuming every image will work in every ratio.
Add the caption in the editor rather than asking the generator to render it on the ball or bench. Keep complete letters and outlines inside the visible frame. Review the mobile version with the final text, because a caption that fits on the source canvas can still be clipped by the player or layout. Keep the line short enough to read without hiding the equipment.
Turn one equipment image into three sports posts
Start with a quiet story cover. Use the ball and glove as the visual anchor and add a short headline such as “Back at the field” in the empty area beside the equipment. Preserve enough of the bench and background to establish the setting. Keep the lettering outside the ball and glove so the subject remains easy to recognize on a phone.
For the second post, build a fictional creator introduction in the same daylight direction. Keep the outfit and character reference fixed, place the equipment beside the creator, and use the scene brief to connect the two images. Review whether the person and glove share a believable scale. For a character holding the ball, inspect the fingers and grip before accepting the output.
For the third post, choose a closer equipment crop or the painted variation. A detail image can emphasize the red seam and leather lacing; an illustrated card can provide a deliberate change in presentation. Keep the campaign colors and caption placement consistent even when the treatment changes. Present it as a creative sports story rather than inventing a player testimonial or an event result.
| Post | Image direction | Final layout check |
|---|---|---|
| Story cover | Wide equipment scene with quiet space | Ball and glove remain visible beside the headline |
| Creator introduction | Same scene light with an original character | Identity scale and object contact remain coherent |
| Detail or illustrated card | Close equipment crop or painted treatment | Stitching stays readable and caption fits the frame |
Build a creator scene around one accepted direction
Approve an original character, outfit and sports setting before making a series. Keep those references together so the next scene uses the same visual baseline. Match the light on the creator with the equipment and background. If the scene uses warm directional light, review highlights and shadows on the person instead of inserting a subject lit like a separate studio portrait.
Clout can create original AI characters and generate photos and videos around a planned scene direction. Use a softball scene brief as part of that creative plan, then review identity, outfit and object interaction in the actual exports. The equipment artwork here was generated independently; it is not a screenshot or performance benchmark of a Clout composite.
Separate a still illustration from an action demonstration
A still equipment image can introduce a sports story without demonstrating a throw, swing or catch. When you want an action, plan it separately with a clear subject, movement and camera direction. Review the complete motion for body position, ball continuity and object contact before adding captions. Do not claim that a static scene proves an animated action works.
Keep an instructional diagram separate from decorative artwork. If field measurements or equipment specifications are part of the content, start with the applicable official or product references rather than a fictional image. Label a generated concept according to the job it actually serves, such as a story cover or creator background.
Save an equipment review with the export
Record your intended use, visible observations, acceptance decision and revisions. Include the principal equipment, stitching, contact shadows, lighting, background, crop and caption. Save rejected versions with a concrete reason so a later revision does not repeat the same problem. Keep the accepted original-resolution image with the brief and final layout.
Finish with the real output: inspect the downloaded dimensions, open the final mobile crop and confirm that the meaningful equipment is visible. For a series, compare the next export with the accepted reference instead of starting a new visual direction each time. For a creator scene, review the character and equipment together before publishing.
Find verified references for equipment and rules
When the post explains playing rules or equipment approval, use the relevant source for that factual question. USA Softball’s official rulebook page provides downloadable rulebooks, and its certified equipment page points readers to equipment listings by category. A generated image supplies a creative setting; those official resources supply the rule and equipment references.
Create an original sports character in Clout
Create your AI character in Clout, choose a sports outfit and scene direction, and generate photos and videos for your next post. Keep the accepted character reference with the equipment brief. Begin with a simple scene, review the exported image, and carry the same look into the next sports story.


