Levitating images show a person or object separated from the surface beneath it. The effect works when the pose, visible gap, background and shadow agree. A surreal idea becomes hard to read when a shoe still touches the floor, a hidden support remains visible or the ground shadow suggests a different light source.
You can create levitation art as an AI-generated still, a composite made from photographed layers, or an illustrated scene. A still image is the finished output for this guide. Animating it is a separate step. Our floating reader and cobalt travel cup are original generated illustrations; they are not photographs of a real stunt or results from a tested video preset.
Choose a levitating picture you can explain in one sentence
Start with a small visual contradiction: a reader stays absorbed in a book while hovering above the courtyard, or a travel cup floats over the table while its shadow remains below. The ordinary activity makes the impossible part easier to notice. A crowded scene with several floating objects may hide the main idea.
| Scene | What stays ordinary | What changes | What must be visible |
|---|---|---|---|
| Floating reader | One creator reading a book | The seated body has no contact with the paving | Complete pose, gap and ground shadow |
| Hovering product | One familiar cup and a quiet tabletop | The cup hangs above the surface | Bottom edge, gap and separate shadow |
| Weightless outfit | A recognizable fashion creator | The pose appears suspended in a studio | Full outfit, feet and believable silhouette |
| Floating still life | A few familiar desk objects | One selected object rises from the arrangement | Clear hierarchy and consistent light direction |
Choose one subject for the first version. Keep the camera and lighting simple. Once that image reads clearly, add a second element only if it helps the story. A floating cup does not need an explosion of fruit, smoke and particles to communicate the effect.
Choose AI generation or a two-photo composite
Generate a new still when you want an original fictional scene and can review the entire image. Use a photographed composite when you need a specific person's likeness, an exact physical product or a location you have already captured. An illustration is useful when you deliberately want graphic shapes rather than photographic realism.
| Workflow | Best starting material | Main review task |
|---|---|---|
| AI-generated levitation art | A scene brief and any permitted references | Anatomy, identity, product details and visual coherence |
| Two-photo composite | A clean background and matching supported-subject frame | Alignment, masks, retained edges and reconstructed background |
| Drawn or painted scene | A sketch with planned light and perspective | Readable silhouette, spacing and intentional shadow treatment |
Generating an entire scene can change the face, outfit and props between versions. For a recurring character, prepare recognizable references with the consistent creator workflow. Keep the same identity anchors while changing the location or pose.
For a real ecommerce item, compare the result with photographs of the actual object. A levitation effect should not silently change a lid, seam, handle or label. Our AI product photography guide covers that reference and review process in more detail.
Write a brief that makes the floating gap visible
Describe the subject, pose, surface, light and camera framing before adding stylistic adjectives. Explicitly ask to see the bottom edge or complete feet. A close portrait can be beautiful while giving the viewer no way to tell whether the person is floating.
One original adult creator with short black hair, a sage overshirt and ivory trousers calmly reads a coral book while sitting cross-legged above limestone paving. Show the entire head, folded legs, shoes and a visible gap beneath the body. Keep a separated soft shadow on the paving, warm daylight from the upper left and a quiet courtyard background. No chair, ropes, duplicate limbs, text or camera motion.
This is an original still-image brief, not a promise that any tool follows it perfectly. The intended hover height is a creative cue; a single generated image does not establish a physically measured distance. Review the visible relationship between body and ground instead of treating a prompt's centimeters as verified output data.
Save the brief and the reference version together. Change one decision at a time: more space beneath the subject, a simpler pose, or a different crop. Replacing the setting, outfit and lighting simultaneously makes it difficult to identify why one version feels more convincing.
Build a photographed composite with a clean background
The NSW Department of Education levitation lesson uses a stationary camera and two images: an empty background, then a subject posed on a support. Keeping the support out of the background frame gives you something real to reveal when masking it away.
- Compose the scene with the camera on a tripod or stable surface
- Capture the empty background with no person or support in it
- Capture the matching subject frame with a simple, stable supported pose
- Place the clean background beneath the subject layer
- Mask the support and refine the remaining subject edges
Keep the setup low and use a stable pose; the illusion comes from editing rather than a dangerous jump or elevated stunt. Keep camera position, framing and exposure consistent between the two photographs. Changing daylight or moving leaves can still make the frames differ, so inspect their alignment before working on small mask details.
Mask only the parts that should disappear. Preserve the original source layers so you can revise the edit. The Adobe layer-mask tutorial explains that masks control layer visibility: white reveals, black hides and gray allows partial visibility. It also shows how selection edges and brush refinement serve different parts of a composite.
A soft brush is useful for some gradual transitions, but it can blur a crisp trouser edge or shoe outline. Match the refinement to the edge. When the support overlaps a hand or clothing fold, inspect that boundary closely rather than erasing the entire region and losing the pose.
Check the shadow and the pose together
A floating subject should have a readable relationship with the receiving surface. Inspect the visible light direction, where the shadow lands and whether any dark contact line still appears to attach the subject to the ground. You are composing an illusion, not validating a physics simulation.
Use the rest of the scene as your reference. A window-lit room, a sunlit courtyard and a deliberately graphic illustration can support different shadow treatments. Avoid using the same dark oval under every subject regardless of the lighting or floor texture.
The reader illustration has a visible gap below the folded legs and a separate ground shadow. That establishes the intended fantasy. The shadow's shape and hover distance are generated artistic choices, not measured properties of a photographed setup. A factual behind-the-scenes explanation would need the actual source frames.
| What to inspect | Useful question |
|---|---|
| Feet or object base | Can I see a continuous gap beneath the intended floating subject |
| Pose | Do the limbs and clothing form one coherent body |
| Shadow | Does its placement agree with the visible light and surface |
| Support removal | Are any fragments or unexplained dark edges left behind |
| Background | Are paving lines, textures and nearby objects consistent |
Zoom in for edges, then zoom back out to the intended viewing size. A technically tidy mask can still produce an awkward pose. Conversely, a compelling composition can hide an obvious extra finger until you inspect the source-resolution image. Both checks matter.
Create a levitating product image with fewer moving parts
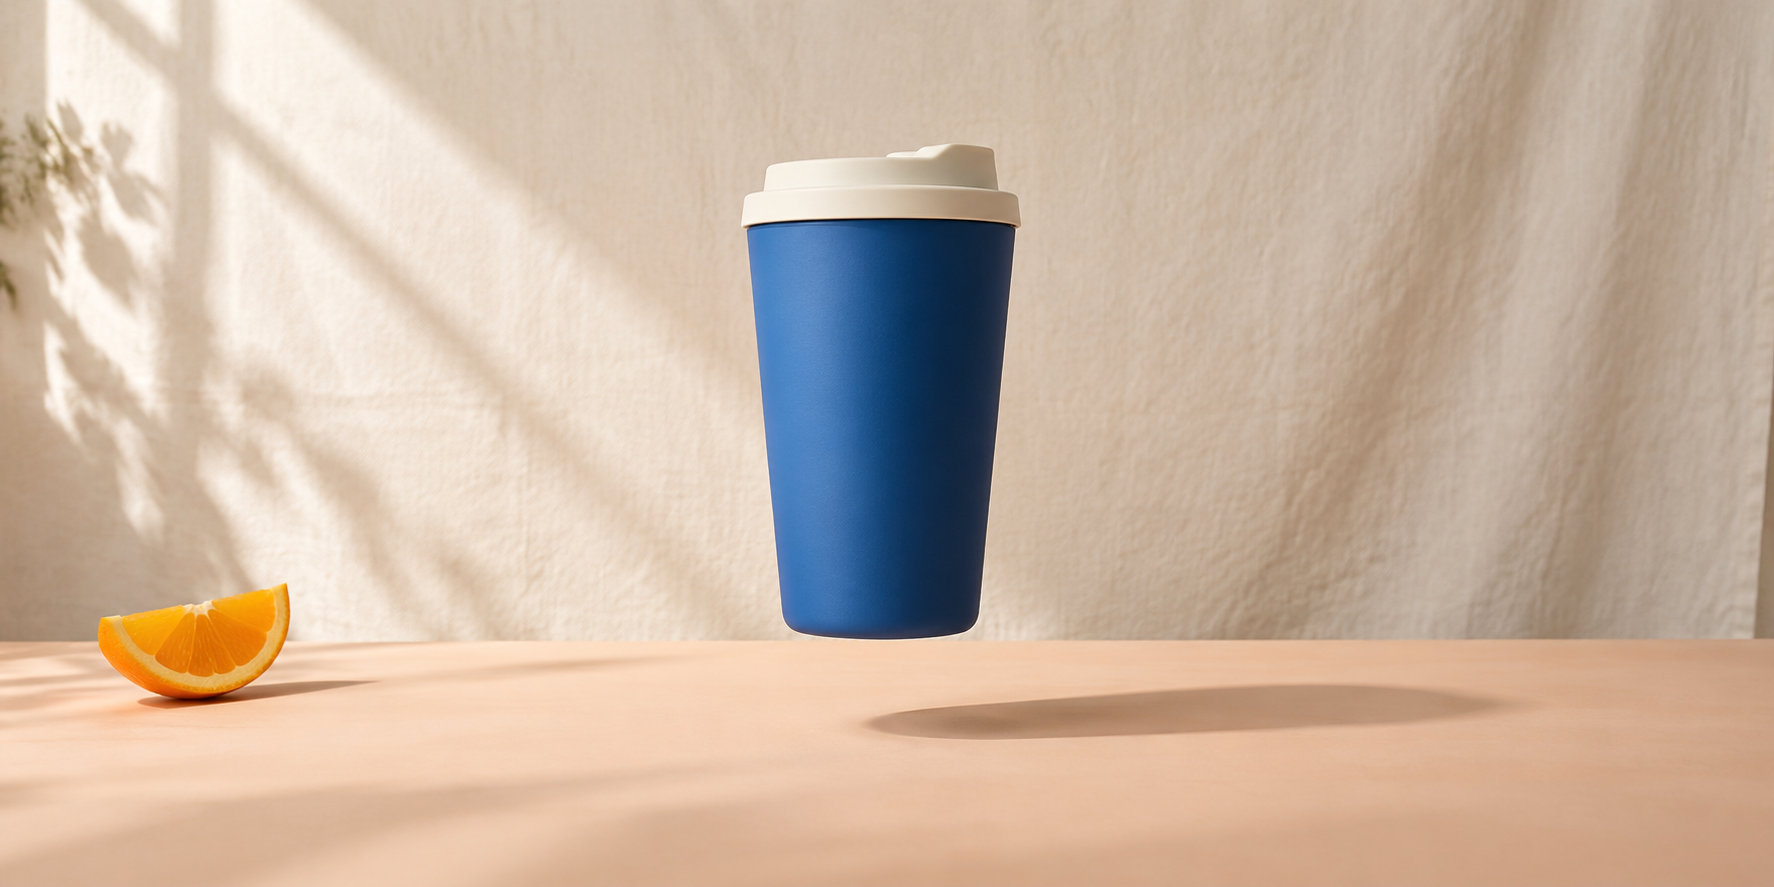
For the product example, one cobalt travel cup hangs above a peach table. A nearby orange slice stays grounded. That ordinary reference helps the cup's separation read without adding a complicated scene. The cup is fictional and unbranded; the image does not verify a physical product's proportions or performance.
One unbranded matte cobalt travel cup with one ivory lid hovers upright above a pale peach tabletop. Show the complete bottom edge and a clear gap. Use daylight from the upper left and one separated cast shadow on the receiving surface. Keep the background quiet and preserve the cup silhouette. No hands, supports, added logos or particles.
For an actual product, replace the fictional object with approved reference material and inspect the details before publishing. If you want components separated to explain construction, use an exploded-view workflow. Levitation presents a whole object suspended in space; an exploded view separates its parts.
Fix the visible failure instead of adding more effects
| Problem | Next revision |
|---|---|
| The subject still appears grounded | Expose the base or feet and increase the visible separation |
| The body looks assembled from different poses | Simplify the posture and review limb continuity |
| The shadow looks pasted onto the floor | Match its direction and treatment to the surrounding light |
| The removed support leaves a patch | Use the matching clean background and inspect texture alignment |
| The product changes shape | Return to clearer references or a photographed composite |
| The final crop hides the gap | Reframe the complete floating pose and its receiving surface |
Keep a simple revision note for each version. For example, record that the opening crop hides the left shoe rather than writing that the entire image is bad. A concrete observation leads to a useful next attempt and helps you compare the result with the original brief.
Turn an approved still into a short levitation shot
Begin with the accepted image rather than asking an animation model to solve the pose and motion simultaneously. Request one restrained movement: a slow rise, a subtle hover or a gentle settling motion. Keep camera movement separate until that first shot holds together.
The Higgsfield Levitation motion page describes a subject floating or rising from the ground. It is a motion effect, not documentation of a still-photo compositing workflow. The public page does not establish exact height controls, fixed duration or guaranteed identity preservation. Check the available controls before committing your brief to that preset.
Review the beginning, middle and end for pose, identity, object shape and the gap below the subject. A rising figure can develop different limb positions or a drifting background over time. Keep the complete body or object inside the delivery crop. Use the camera movement guide if the next version needs a deliberate camera move.
Package the image for a recurring creator campaign
Give the effect a reason to exist. A fictional reader who is too absorbed to notice floating can support a light comedy series. A hovering cup can introduce a product scene without changing its basic design. Use the same creator, palette and props across the surrounding campaign.
Download the original scene brief sheet for the reader and cup examples. It contains creative plans, not generation test scores. Download the blank review sheet to record what you actually see in your own output.
Preserve the native-resolution master and inspect every delivery crop. A portrait version can remove the shadow; a wide banner can cut off the top of the head. Keep the subject, gap and relevant ground together before placing campaign text. Clout can create your original recurring character, reference photos and video scenes around that identity.