

An animal maker is most useful when it gives you a character you can recognize again. A cute animal image is easy to enjoy once. A story, mascot or recurring social format needs more: a clear identity, a believable action and a way to change the scene without accidentally changing the animal.
This guide focuses on AI-generated animal images. It does not select a random real species or teach biological animal breeding. You will find an original capybara barista example, a reference-based follow-up scene, reusable prompts and an editable character brief. The examples are fictional artwork, not records of real animal behavior.
For a wolf-human character and a readable human-to-creature transition, use the AI werewolf guide with original planning references and a frame-review sheet.
Decide which kind of animal you want to make
Choose the creative job before choosing the style. A pet-inspired portrait needs recognizable markings. A wildlife illustration needs the right species features and environment. An invented mascot needs a small set of repeatable design choices. A fantasy hybrid needs a coherent body plan rather than a pile of unrelated parts.
| Creative job | Start with | Review first |
|---|---|---|
| Original mascot | Species and a short character brief | Recognizable silhouette and face |
| Pet-inspired illustration | Your own clear reference photo | Coat markings muzzle and ears |
| Wildlife artwork | Species and setting references | Anatomy and plausible environment |
| Imagined creature | One primary body plan and limited additions | Readable limbs and coherent design |
| Recurring story character | One approved identity image | Continuity across different actions |
The official Adobe animal generator page describes creating animal imagery from prompts. Higgsfield's animal generator page describes prompt and reference workflows across different styles. Those descriptions establish available approaches; they do not prove that a particular generated animal will have accurate anatomy or retain its identity.
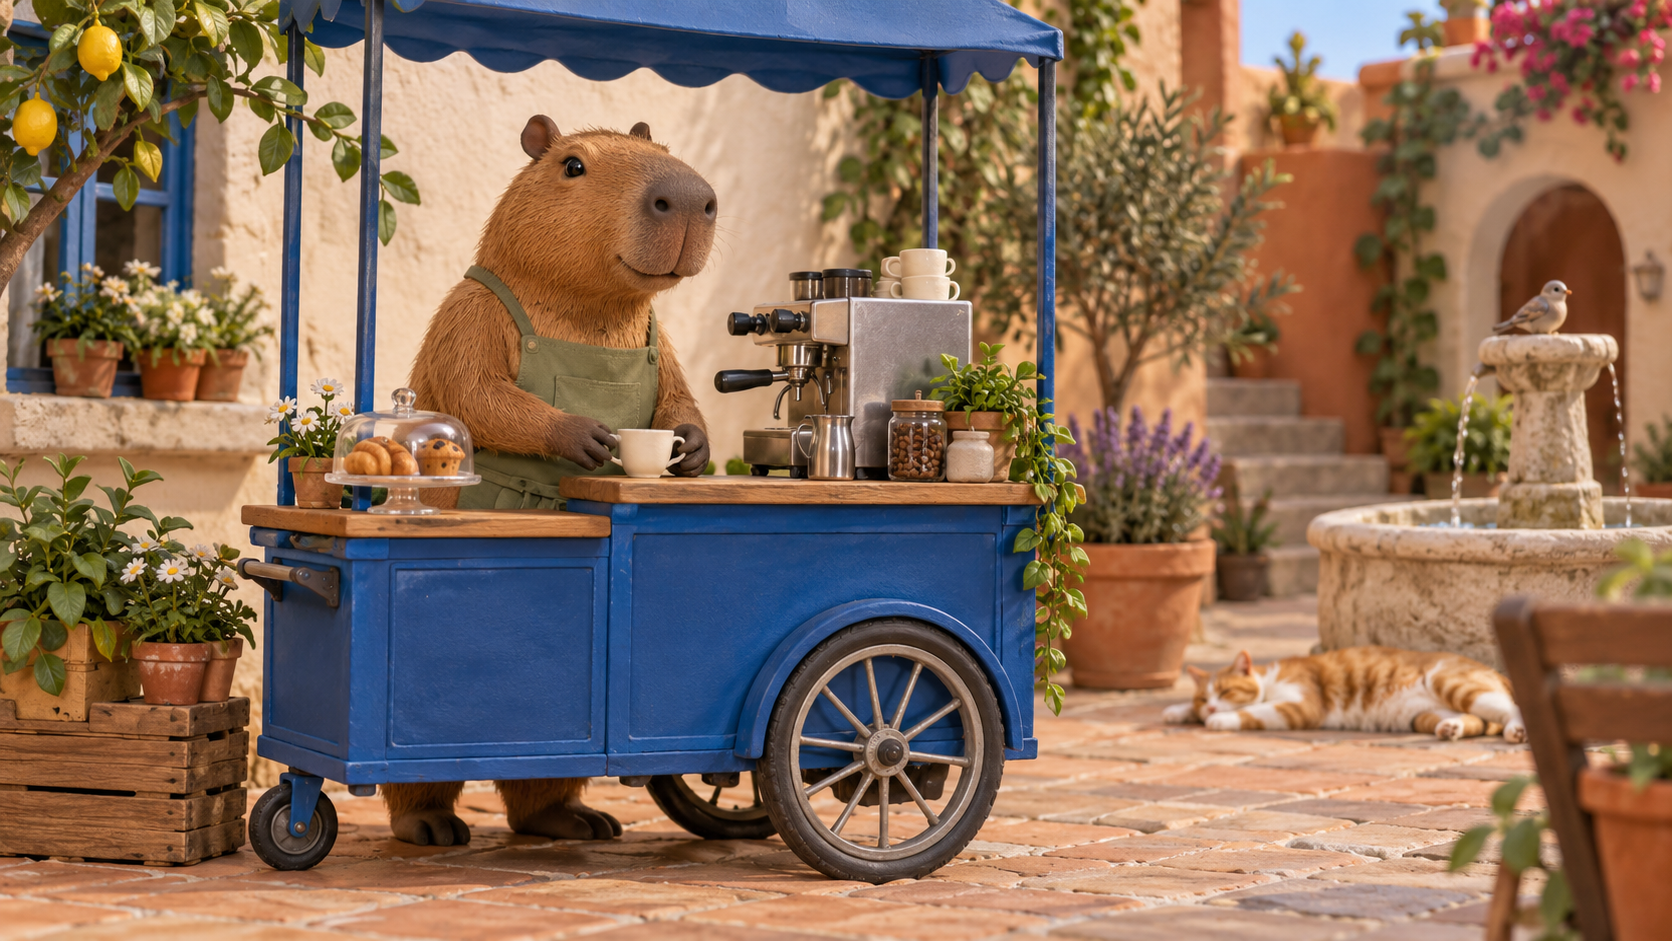
For this example we chose an original, stylized capybara character. The broad muzzle, round ears, brown fur and sage apron form the identity. The cobalt coffee cart and warm courtyard provide a recognizable setting. That small set of decisions is easier to carry between scenes than a long list of decorative details.
Download the original capybara character
Download the original capybara scene
We generated this scene from an original brief. The capybara's front paws sit near an ivory cup while its rear feet are visible below the cart. The broad muzzle and small ears make the species readable. A cat and bird add background life without taking over the central action.
The original brief requested a clay-style scene. The result is closer to a textured miniature render with visible fur than a smooth sculpted clay character. Keep that distinction in your approval notes. A prompt describes the intention; the actual image determines whether the chosen style works for your project.
The direct download is a native 1672 by 941 lossless WebP. Its decoded pixels match the generated PNG master. Save the file rather than a page screenshot when examining the fur, paws and cup. These gallery downloads require no account; creating your own project uses the product's current access and billing.
Build a character brief you can reuse
Download the editable animal character brief. It contains five planning categories and a completed capybara example. The columns for your own character and approval notes are blank. Use those fields to define the identity before creating more scenes.
| Category | Capybara example | Why it matters |
|---|---|---|
| Species features | Broad muzzle small round ears brown fur | Distinguishes the character from another rodent |
| Wardrobe | Plain sage apron | A stable visual anchor |
| Palette and setting | Cobalt cart cream and terracotta courtyard | Connects separate compositions |
| Character role | Calm barista with a mildly amused expression | Gives the animal a repeatable story function |
| Action constraints | One cup and plausible contact with paws | Makes the moment understandable |
Keep the character description separate from the scene request. The identity describes what should remain familiar. The scene request describes what changes today. If every prompt changes the species, fur, clothing, palette and camera language, the results may look attractive but will not form a recognizable series.
For a pet portrait, replace wardrobe with actual coat markings and facial features. For a fantasy creature, record the primary body shape and the exact placement of added features. Do not ask for a different hybrid combination in every scene and expect the same creature to emerge.
Write your first animal image prompt
An original capybara barista with a broad muzzle, small round ears and warm brown fur, wearing a plain sage apron behind a cobalt espresso cart. Cream and terracotta courtyard, warm morning light, handcrafted miniature visual style. The animal holds one plain ivory cup with plausible front paws. Keep the complete character and cart visible, with no wording or logos.
This is a reusable shortened version of our original creative direction. Choose one species, one role and one action. Name the important colors and set a clear framing requirement. The point is to give the model a readable moment rather than ask it to include every idea you have.
Use specific visual nouns. A broad muzzle, a round ear, a striped tail or a cream chest patch is easier to inspect than “perfectly consistent cute animal.” Review the first result before adding more complexity. If the animal's identity is unclear, fix the character before expanding the story.
Create a second scene from the accepted reference
Download the serving scene
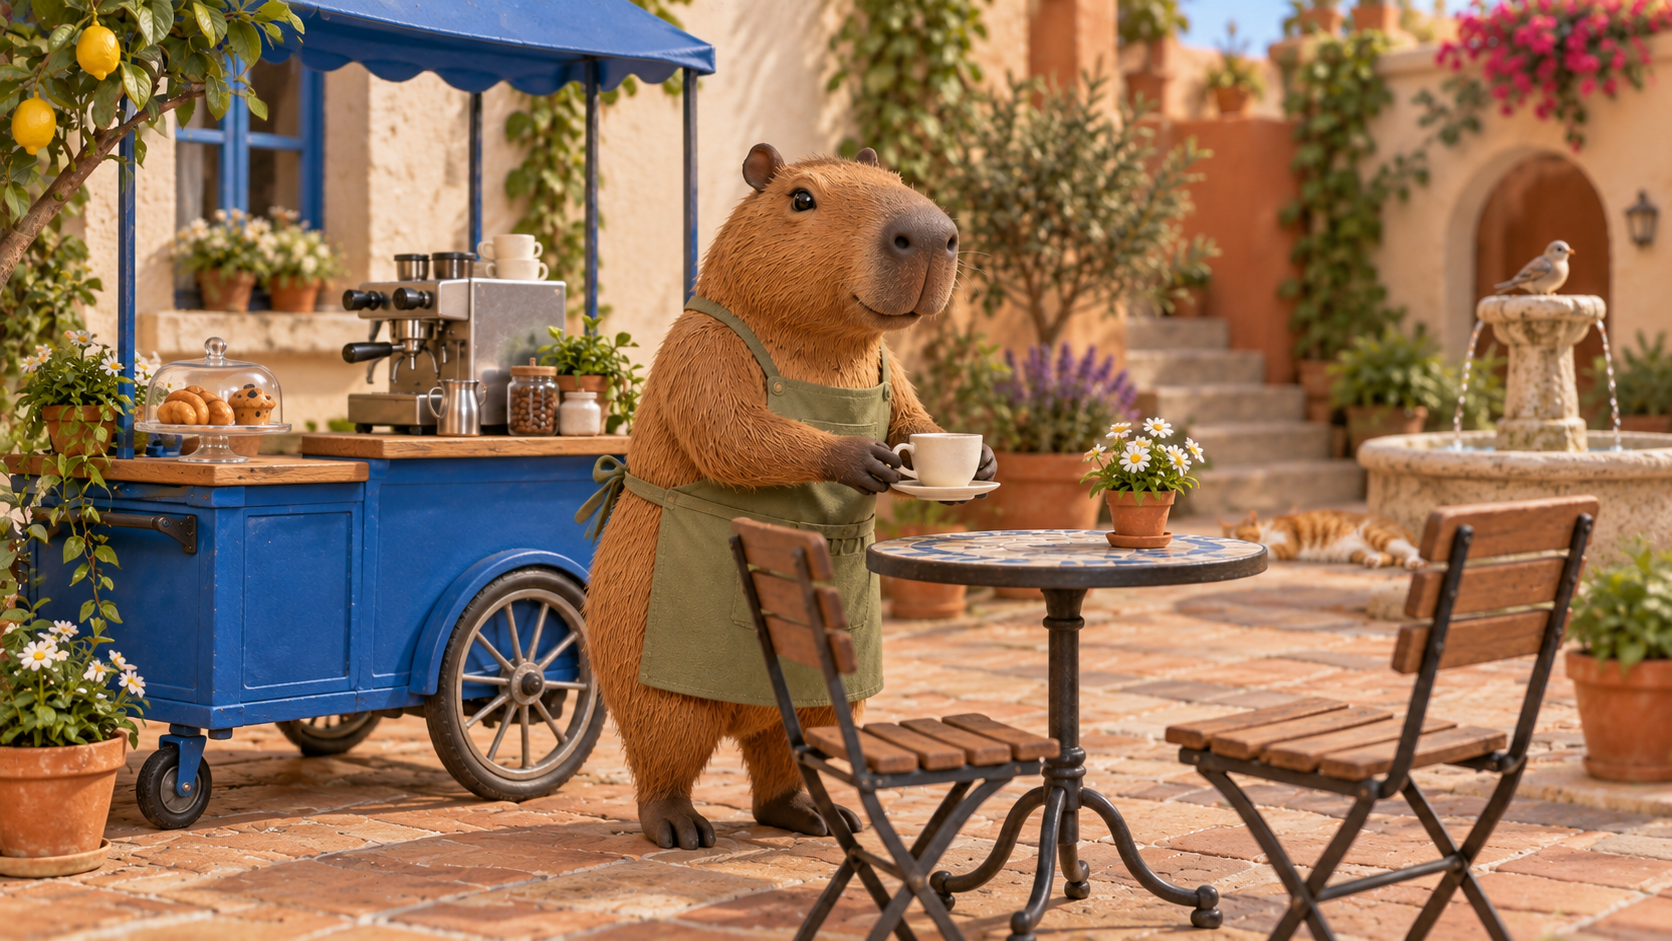
We supplied the first image as a reference and requested a new serving action beside a cafe table. The second result retains the broad muzzle, brown fur, sage apron, cobalt cart and courtyard palette. It moves the animal out from behind the cart and changes the camera arrangement. A saucer appears beneath the cup.
That is visual continuity based on inspection, not identical pixels or a controlled consistency benchmark. The cart and table geometry also change. If your story requires an exact prop layout, reject or revise those changes rather than treating matching colors as sufficient proof.
Use the accepted capybara image as the identity reference. Keep the same broad muzzle, round ears, brown fur and sage apron in the same warm courtyard. Create a distinct follow-up scene beside the cobalt cart, offering one ivory coffee cup toward an empty cafe table. Complete character visible, plausible paws and cup contact, matching warm daylight, no text or logos.
Change one meaningful action at a time. Keep the wardrobe and visual style stable for the first pair. Once you have a scene that passes review, use it as an additional reference where your editor supports that workflow. Avoid replacing the approved identity with a nearly correct failed attempt.
Review animal anatomy and story clarity
Stylization changes proportions, but it does not remove the need for readable anatomy. Count the visible limbs and inspect where each connects to the body. Look for duplicated paws, strange cup handles or a tail that belongs to a different species. Review the points where the animal touches a prop; those are often more revealing than the background.
Then review identity. Compare the muzzle, ears, fur color, distinctive markings and overall silhouette. A change in camera angle naturally changes the view, but it should not turn a capybara into a beaver or alter a pet's defining markings. When identity fails, simplify the pose and strengthen the reference before changing the environment again.
Finally review the story at phone size. The viewer should understand the action without needing a paragraph of explanation. In our pair, the first scene introduces the barista and the second shows serving. That simple progression gives the images a reason to exist together.
Choose a style for the actual output
A realistic look suits a pet-inspired portrait or a grounded imagined scene. Illustrated or stylized rendering can give a mascot a clearer silhouette and a more playful expression. Neither is automatically better. Choose the look that fits the story, then inspect whether the actual result matches it.
Keep generated lettering out of the first character brief. Add a caption or brand name in a design editor after the image is approved so you can control spelling, spacing and placement. Leave room for that text deliberately. If the picture needs a different shape, use the image expansion guide to distinguish protected-source editing from regeneration.
Turn your animal idea into a short story
An animal character works best when it has a simple role and a small problem. A barista who keeps getting interrupted, a courier who delivers to the wrong door or a sleepy gardener who discovers an unexpected visitor gives you an action to build around. Start with the introduction, complication and reaction before requesting animation.
Create a faceless story in Clout around your original animal idea. Plan short connected scenes and review the final output for readable action and character continuity. The still images in this guide are not finished videos and do not establish motion quality, timing or stable identity across frames.
Keep the original artwork and your character brief together. A repeatable creative process comes from knowing what was approved, what may change and why each scene advances the story. More generated pictures are useful when they make that story clearer.


