

An AI coloring page generator turns an idea or reference photo into line art you can color. A usable page needs more than a pleasing subject: clear outlines, understandable overlaps, enough open space and an export that fits the paper. Start with one page and review it before making a whole book.
For a separate tactile illustration workflow, inspect our AI crochet image and pattern-evidence guide with an original yarn concept and exact detail crops.
This guide includes an original garden-fox PNG, a Letter-size PDF and a reusable prompt brief. We generated the example with the built-in image generation tool, measured the native file and rendered the PDF for visual inspection. The colorful desk cover is a separate editorial concept, not a photograph of a tested print or a preview of the exact download.
Choose text generation or photo conversion
| Your starting point | Useful workflow | Main review question |
|---|---|---|
| A new story or activity idea | Describe a simple scene for text-to-line-art generation | Are the shapes clear and complete |
| Your own pet or object photo | Convert the photo to simplified line art | Did the recognizable features survive |
| An accepted drawing | Place the artwork on the intended paper size | Does the export preserve the composition and margins |
A detailed photograph can introduce more outlines than you want. Choose a source with one clear subject and limited background clutter. When inventing a scene, keep the number of subjects small enough to inspect every interaction. A dense garden can look impressive while leaving almost no room for coloring.
Download the original fox coloring page
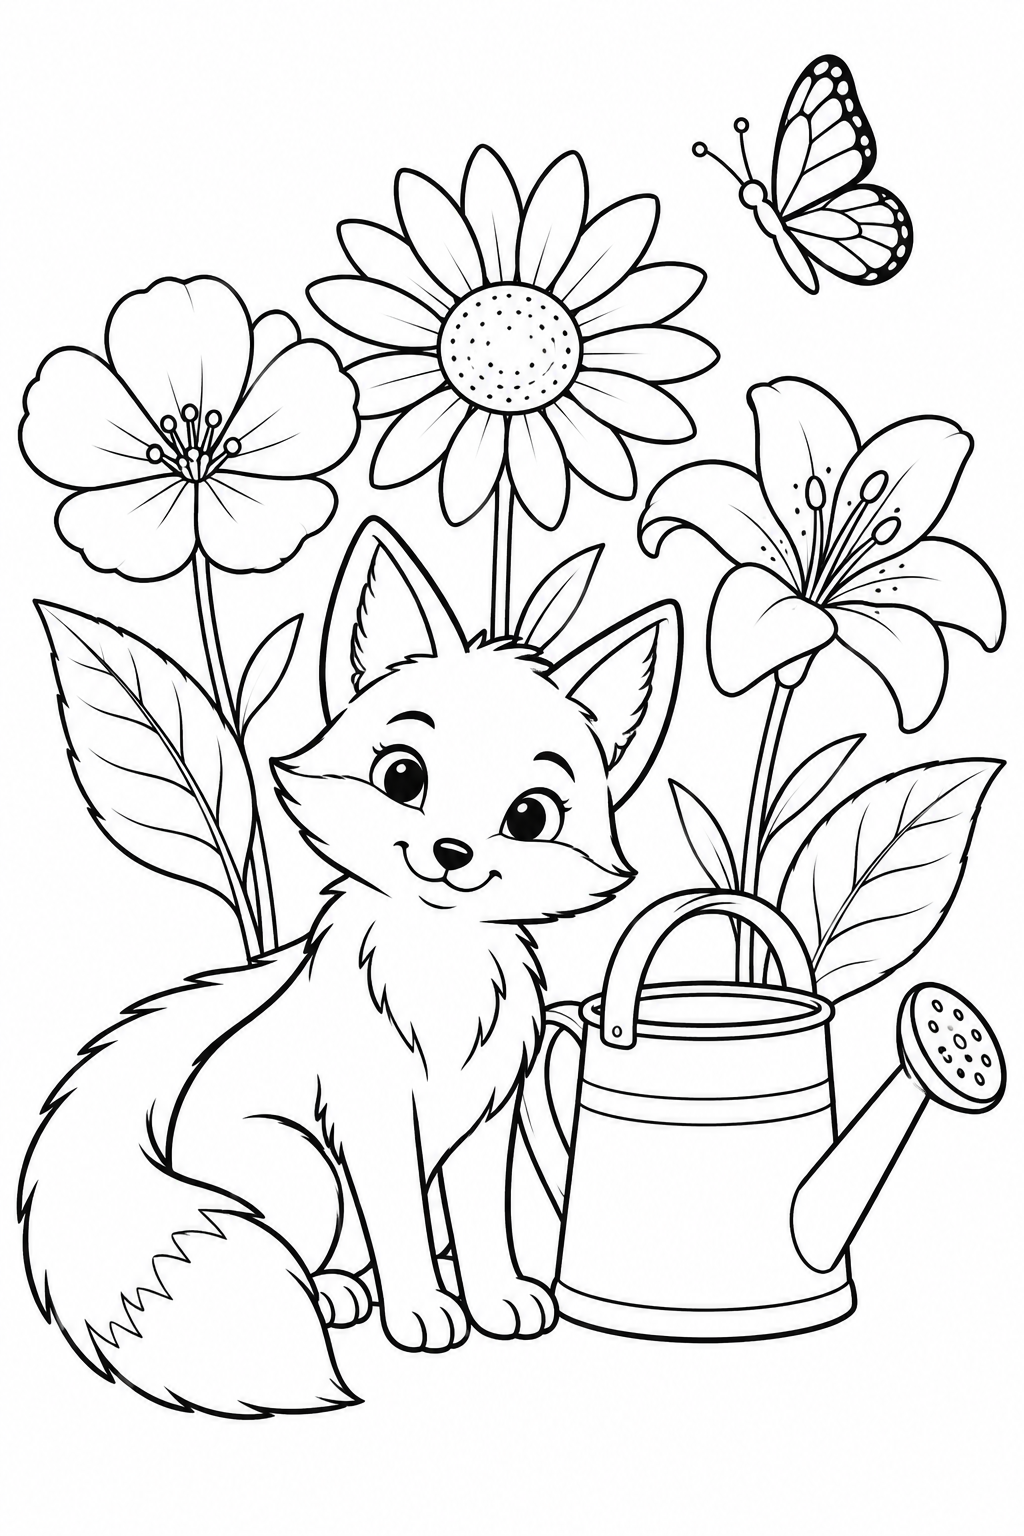
Download the native PNG or download the Letter-size coloring PDF. The PNG is 1024 by 1536 pixels. The PDF places that artwork at 6 by 9 inches on an 8.5 by 11 inch page, leaving 1.25 inches on each side and 1 inch above and below.
The PDF contains the same raster source, not newly created vector paths. At the specified placement it provides about 170.67 pixels per inch. We reopened the single-page file and inspected a rendered preview for clipping and placement. We have not physically printed it, so check your own paper, printer and result.
Inspect the flower interiors and leaf details before choosing this level of complexity for your activity. The example includes fine and faint gray linework; it is not a strict two-color bitmap or a promise that every region forms a closed boundary. The file and layout record documents the measured dimensions and download hashes.
Write a coloring-page prompt that controls complexity
Describe the subject, pose, nearby objects, line treatment and page shape. Ask for the whole subject inside the frame. Specify large open areas when that matters more than decorative detail. Keep words out of the generated drawing if exact spelling is not part of the task; add titles separately in your layout editor.
One friendly fox seated beside a watering can and three large garden flowers, portrait composition, complete objects inside the edges, clear black outlines on white, large open shapes, simple readable overlaps, no lettering, logos, gray shading, dense crosshatching or decorative border
This is a direction to review, not a guarantee that a model will satisfy every constraint. Our example still contains fine details. If the first result is too intricate, change the drawing request to fewer petals, broader leaves or a single flower rather than adding more conflicting adjectives.
Download the reusable prompt brief and replace the subject while keeping the layout requirements. A second page might feature a sleepy cat in a basket, a small sailboat beside reeds or a friendly robot tending one plant. Change one composition decision at a time so you can identify which prompt revision helped.
Generate from a text prompt in Adobe Express
Adobe's official coloring-page instructions describe opening a Drawing worksheet, choosing Generate coloring page in Templates, entering a description and selecting a preferred variant for the canvas.
Use the brief above as a starting point and review the returned drawings before arranging the page. Check the current account for access and any generation allowance. This guide uses Adobe's published instructions; the fox download is our separate generated example, not an Adobe Express account test.
Turn a photo into a coloring page in Canva
Canva's AI coloring page generator describes uploading a photo, choosing a style and aspect ratio, and bringing the result into its editor or downloading it. Its page lists PNG and PDF export options.
For a pet photo, compare the result against the source: ears, muzzle, markings and the silhouette should still describe the intended animal. Remove unnecessary background complexity in your chosen workflow rather than assuming every photographed texture belongs in the line art. We did not run a Canva conversion for this guide.
Review outlines before building a coloring book
- Read the scene at thumbnail size to check whether the main subject is obvious.
- Zoom in on feet, handles, stems and overlapping objects.
- Look for disconnected lines, accidental double contours and areas that are too small for the intended activity.
- Check whether shadows have become unwanted dark patches.
- Inspect the full page at the intended physical size before accepting the export.
Use the blank coloring-page review sheet to record actual dimensions, outline defects, overlap defects, small spaces and your print observation. The observation fields are empty because those results depend on the file and physical setup you actually review.
For a series, keep a short style specification: line weight, detail level, subject scale and margins. Review each page against it. Matching prompts can still produce different drawing density, and a collection of individually attractive images may feel inconsistent as a book.
Export the page at a deliberate size
Open the PDF preview and check the selected paper size before printing. Choose Actual size if you want to preserve our 6 by 9 inch placement. Fit-to-page or another scaling setting can change that size. Printer settings and unprintable margins vary, so inspect the preview and one physical sheet before making a batch.
If you need a different artwork size, calculate it from the actual pixel dimensions. The print-size planner in our artwork guide can calculate proportional height and effective pixels per inch for a raster file. It does not create detail, approve print quality or convert a drawing into vectors.
For a broader creative project, use the accepted line art as a separate source asset. Keep a colored presentation, a book cover and the printable interior as distinct files. You can explore Clout's image and video workflows for related visuals, while keeping the reviewed printable master unchanged.


