

AI T-shirt design starts with an artwork idea and ends with a file prepared for a specific garment and printing method. Generate the graphic separately from the promotional mockup, check its actual pixels and transparency, then plan its physical size against the selected printer’s requirements.
This guide includes our original tiger-and-crescent PNG and a free print-size planner. The green-shirt cover is an editorial concept mockup, not a photographed printed sample. We generated the artwork, inspected its dimensions and alpha channel and tested the planner’s calculations; we did not order or test a garment.
Choose the design job before generating
A chest graphic, an all-over pattern and a promotional photograph are different deliverables. A scene showing someone wearing a shirt can communicate a visual direction, but it is not automatically the separate artwork file a printer needs.
| Deliverable | What to create | What to inspect |
|---|---|---|
| Chest graphic | Standalone illustration or lettering | Edges, background, actual pixel dimensions and placement |
| All-over design | Artwork for the selected garment template | Template coverage, seams and product requirements |
| Product concept mockup | A visual presentation of the shirt | Whether it represents the accepted graphic and garment |
For our original example, the deliverable is a compact illustration: an orange tiger with a cobalt crescent, ivory stars and coral leaves. It contains no lettering, brand or garment. That keeps the downloadable graphic distinct from the cover’s shirt presentation.
Download the original transparent artwork
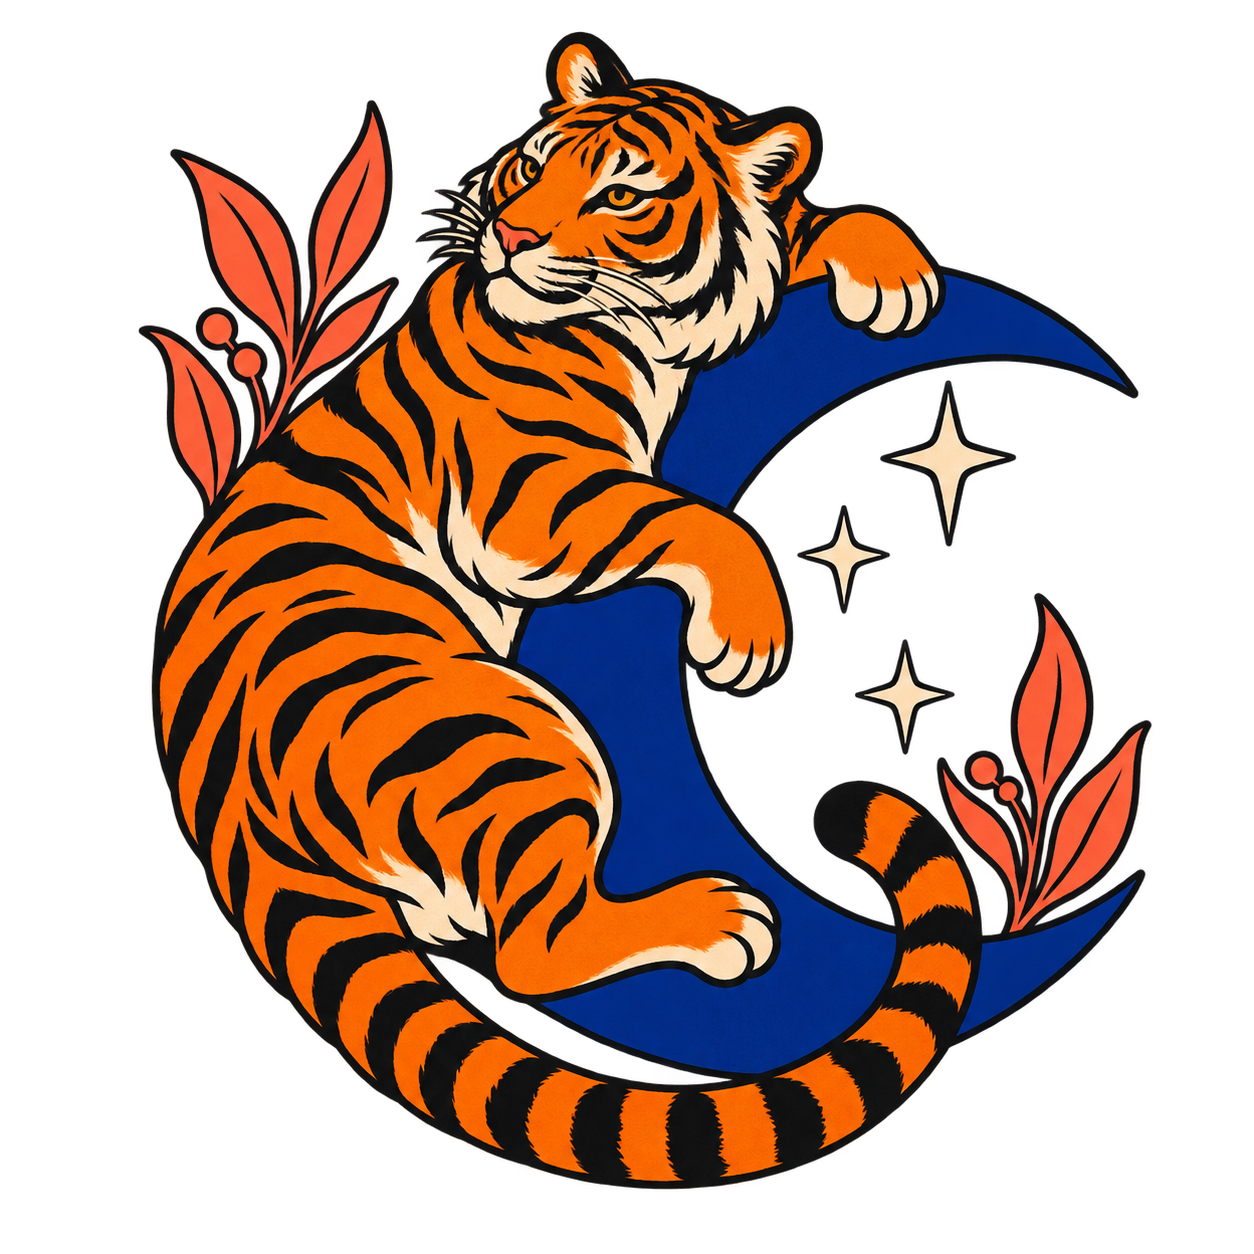
Download the native transparent PNG and its dimension and file-hash record. The native file is 1254 by 1254 pixels with an alpha channel containing transparent and opaque pixels. It is a raster image, not a vector drawing or a set of separated printing inks.
The artwork was generated with the built-in image generation tool for this guide. It is not an Adobe or Printful result. The shirt mockup uses it as a visual reference and may reinterpret details; use the standalone download when inspecting the actual artwork file.
Write a brief for a separate graphic
Download the original design brief. State the subject, silhouette, colors and background requirement before choosing a model. For a compact graphic, avoid adding a complete room or a photographed garment to the artwork prompt.
Create one original isolated illustration: an orange tiger curled around a deep cobalt crescent, three small ivory stars and coral botanical leaves. Use bold, confident shapes with a hand-inked character and a compact balanced silhouette. No lettering, brand, shirt, mockup, border or background. Leave transparent space around the drawing.
This is a reusable brief based on our generated example, not a guarantee of a printer-ready result. A screenprint-like visual style does not establish a particular ink count or production technique. Inspect the actual exported file and obtain the preparation your chosen printer requires.
Use an AI T-shirt generator as the artwork stage
Adobe’s T-shirt design guide describes generating imagery, editing the design, adding text effects and customizing the layout. That is a useful distinction between creating a graphic and finishing a garment design. Check the actual features and output options available in the editor you select.
In Clout Image and Video, inspect the current image operation and supported output before generating a design. This guide does not claim that every operation exports transparency or produces the same controls as Adobe Express. Confirm what was actually delivered rather than relying only on the wording of the prompt.
For a design with exact words, keep an editable text layer in your design editor or review every generated letter. Correct spelling before producing mockups or a larger campaign asset set. A visually attractive phrase is still wrong if it changes the intended wording.
Calculate effective PPI from pixels and print width
Use the free print-size planner above with the actual pixel dimensions. It preserves the image proportions: you choose the width in inches, and it derives the height. Effective pixels per inch equals the pixel width divided by the planned physical width.
For our 1254-pixel square, an eight-inch width gives 156.75 PPI. Four inches gives 313.5 PPI, and twelve inches gives 104.5 PPI. The artwork has the same pixels in each calculation; the physical size changes. These examples do not approve any size for a particular garment.
The planner downloads a CSV containing the calculation and leaves printer requirements and physical-sample review empty. It does not resample the picture, inspect its color profile or measure a printed product. Changing a resolution label in a file is not the same as creating additional useful detail.
Check the selected product’s print requirements
Printful’s file preparation guidance recommends checking the product and print area, resolution, format, profile and transparency. It explains why PNG can suit transparent DTG artwork while JPEG does not preserve transparency, and recommends sRGB for its uploaded files.
The same guidance makes dimensions and resolution product-specific. Do not treat one familiar pixel size or a general DPI recommendation as a universal template for every shirt. Open the actual product’s file guidelines and compare the accepted artwork at its intended placement size.
Keep the source PNG unchanged while preparing the production export in your editor. If you remove a background, resize, recolor or add lettering, save that as a separate version. Record the new dimensions after the edit instead of carrying the original measurement into a changed file.
Review the graphic on the garment concept
Once the artwork version is accepted, inspect its placement on the selected garment template or a clearly labeled concept mockup. Check the relationship between the print, neckline, seams and intended wearing view. A dramatic product photograph should not hide a placement problem.
Compare the mockup with the actual graphic. If a generative mockup changes the tiger’s pose, crescent shape or detail, it is a related illustration rather than proof that the accepted file will appear exactly that way. Keep the original download available for the production review.
Use the blank artwork and sample review sheet to record the production file, product template, size calculation and observed sample result. No physical-review fields are prefilled because no garment was printed for this guide.
For a separate printable line-art project, use our AI coloring page workflow and original fox download. It includes a Letter PDF with explicit artwork placement.
For a different finish-edit use case, compare the source and result in our AI car design workflow before planning a promotional image.
Keep the approved files for the next design
Save the native artwork, edited production version, chosen product guidelines, size plan and accepted mockup together. If the next shirt has a different print area, recalculate from that file and review the new placement rather than assuming the first setup transfers unchanged.
For a broader campaign, create the promotional image after the design decision is clear. That sequence gives you a useful chain from original graphic to production planning and presentation, with each deliverable identified for what it actually is.


