A 3D image can mean a rendered picture, a stereoscopic image or an actual model viewed on screen. Those outputs solve different jobs. For a creator campaign, you may only need a polished image that looks like a studio render. For a game, interactive viewer or physical prototype, a convincing picture is not enough.
This guide focuses on the first job: creating an original flat image with a clear volumetric appearance. The downloadable radio below is generated artwork. It is not a CAD drawing, a mesh or a measurement of a real device.
For a moving photo card or a product turntable, use the 3D image rotation guide and local preview. A render-like still, a generated spin and an editable mesh are different outputs.
Choose the deliverable before choosing the tool
| Output | What you receive | What to check |
|---|---|---|
| 3D-style image | A flat image with depth cues | Silhouette, shadows, materials and composition |
| Video of a rendered object | A fixed sequence of frames | Shape and light continuity throughout the movement |
| Editable 3D model | Geometry in a supported model format | Topology, scale, materials and compatibility |
| Stereoscopic image | Paired views or another stereo representation | Viewing method and comfortable depth |
Write down where the asset will appear. A blog cover needs a readable composition at small size. A product concept may need consistent alternate views. A web viewer needs a model that the viewer can load. Do not pay for an image-generation workflow expecting a downloadable mesh unless the actual tool documents that output.
Download an original 3D-style radio image
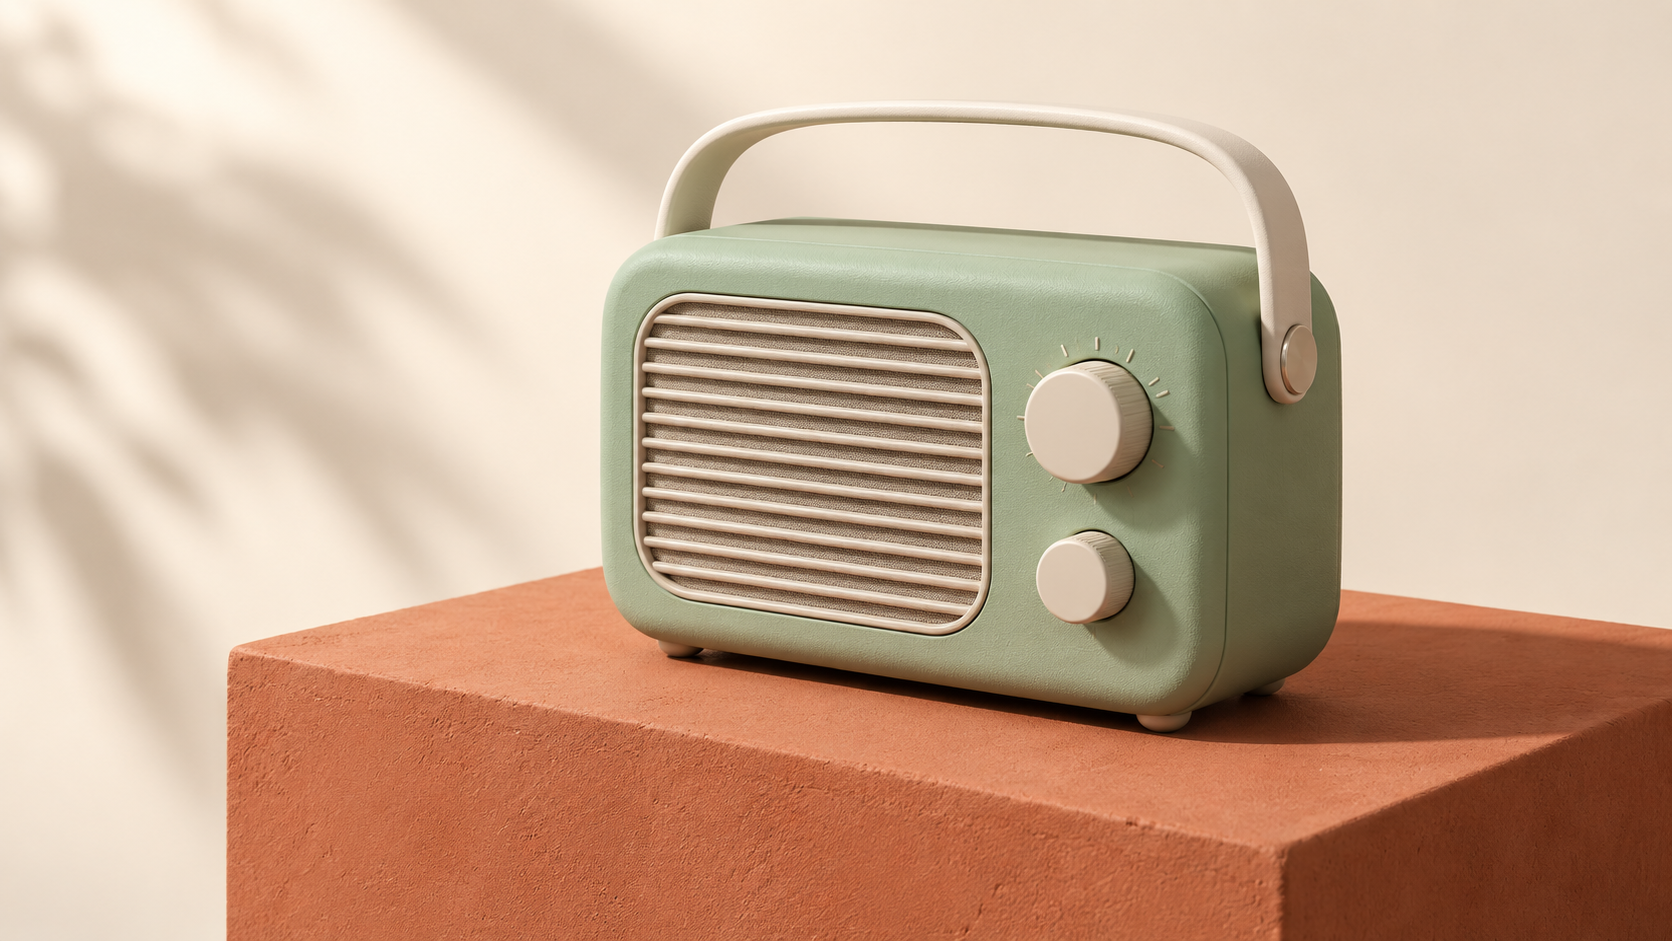
Original AI-generated studio-render concept of a fictional unbranded radio. The image shows a designed appearance, not internal engineering or editable geometry.
Download the original reference imageThe mint enclosure, ivory handle and warm plinth separate the object from its environment. A three-quarter angle makes both the front and side visible. The shadow gives it a place to stand. Those few decisions do more to communicate volume than a long list of render-engine names in the prompt.
Use this reference as a composition example, not a commercial claim about a real radio. If you sell an actual product, provide accurate product references and check every visible control, opening and proportion against them. A beautiful invented dial is still the wrong dial when customers expect the photographed item.
Build a prompt from five concrete decisions
Start with the object and its complete silhouette. Specify the material for each important surface. Choose a camera angle that reveals the form. Place it in a simple environment and define one clear light direction. Finish with constraints that keep labels and unrelated objects out of the frame.
An original mint-green portable radio with a rounded ivory handle and two tactile dials, entire object visible on a terracotta plinth. Three-quarter camera angle, matte painted enclosure, gently textured plastic handle and coherent contact shadow. Broad soft studio light from upper left, cream background, generous space around the silhouette. No text, logos, interface panels or extra devices.
Refine the weakest decision first. If the shape is unclear, fix the angle or silhouette. If the image looks flat, clarify the light and contact shadow. If the surface looks wet, replace vague words such as glossy premium finish with a specific roughness and reflection description. Change one category at a time so you can understand why a revision worked.
Try three material variations on the same form
| Variation | Prompt change | Review priority |
|---|---|---|
| Matte painted enclosure | Broad soft highlights and subtle surface texture | Avoid chalky or muddy edges |
| Brushed aluminum enclosure | Fine directional brushing and restrained metal reflections | Keep the brush direction consistent |
| Translucent colored enclosure | Soft light transmission through a colored shell | Keep transparency distinct from invented circuitry |
Preserve the accepted shape, camera and background while exploring materials. A new silhouette makes a material comparison harder to interpret. Save the accepted reference and use reference-based editing where the chosen workflow supports it. A text-only request for the same object is a brief, not a guarantee of identical geometry.
For a translucent concept, be clear about the interior. Ask for an abstract color treatment if you do not have real construction details. Invented components should not be presented as a factual cutaway. Our 3D reconstruction guide covers the separate challenge of deriving geometry from source views.
Make a photo look three dimensional without losing the object
A make-it-in-3D effect usually asks for an image with volume, lighting and material cues. If the picture looks like a really good 3D model, that describes its appearance rather than proving that a mesh exists. Keep the output type explicit when saving or handing off the asset.
For a glossy variation of the radio, preserve the handle attachments, two dials and enclosure outline while changing the surface finish. Use broad controlled reflections so the face of the device stays readable. Compare the accepted matte version with the glossy version at the same camera angle; a different object shape defeats that comparison.
Use the accepted mint radio reference. Keep its complete silhouette, ivory handle and two dial positions. Change only the enclosure finish to a restrained glossy coating with broad studio reflections. Preserve the three-quarter camera, cream background and terracotta plinth. Keep the reflections consistent with the existing soft side light.
For a lifelike 3D style, inspect believable scale relationships, contact shadows and the way each surface responds to the light. More gloss is not automatically more realistic. A handle that fails to connect or a doubled control remains a visible continuity error regardless of the rendering finish.
Understand photo-to-render workflows
Higgsfield's 3D Render app presents an image-upload workflow for an object in a rendered environment and labels the generation type as video. That documented page does not establish an editable mesh export. Inspect the current output choices before selecting it for a modeling task.
Choose a reference with a clean object outline, visible surfaces and adequate resolution. A cropped handle or hidden side forces the generator to invent more of the form. For a real item, collect additional verified views. Compare the output against the source rather than assuming a realistic-looking scene preserves the source dimensions.
Review shape and light before exporting
Inspect the object outline at full size and at the intended display size. Look for asymmetrical controls, handles that fail to connect, inconsistent perspective and shadows pointing away from the light. Check whether the plinth intersects the object and whether reflections describe the same environment.
For alternate views, place the outputs next to one another and compare the same landmarks: dial spacing, handle attachment, corner radius and enclosure depth. If those features change, you have a set of interpretations rather than verified views of one model. Use an actual modeling workflow when those relationships must remain fixed.
Connect the render to a creator campaign
A rendered concept can introduce a visual theme for a character's photos and videos. Match the palette and lighting to the scene instead of adding the object as an unrelated decoration. Keep the campaign copy accurate about what is conceptual and what is the actual offer.
Create your campaign character in Clout and generate coordinated imagery around a consistent identity. Keep the original master image and compose separate crops for the cover, vertical scene and product detail where needed.