An AI T-shirt mockup workflow places accepted artwork on a garment reference so you can review its presentation before building a campaign. Keep the design file separate, choose the right shirt view and compare the returned image with both inputs. A convincing picture can still change the graphic, collar or print position.
Choose a mockup task rather than another design task
If you already have a graphic, the next job is placement. Asking for a new tiger T-shirt can produce a related illustration instead of showing your approved design. Supply the actual artwork and explain which garment details should remain fixed. Keep the original graphic available during the review.
The T-shirt design guide includes our original transparent tiger-and-crescent PNG and print-size planner. For the broader choice between template placement, poster layouts and generative scenes, see our AI mockups workflow. This page takes that accepted artwork into a separate fictional garment presentation. It does not replace the production file with a photograph of the shirt.
Choose a reference that shows the actual garment
For a real product, use an owned photograph or an approved template for the selected garment. Record the color, collar, sleeve shape, seams and view. A generic generated tee is useful for a concept, but it does not establish a supplier SKU, fabric weight or available size.
Our study uses an original fictional blank ivory crew-neck T-shirt on a terracotta surface. The overhead view shows the neckline, both sleeves and lower hem, making it easier to inspect what changed. There is no person, brand label or physical garment measurement in the source.
Compare template placement and generative placement
| Approach | Useful when | Review |
|---|---|---|
| Approved garment template | You need a repeatable selected product view | Correct product variant and artwork mapping |
| Reference-led image edit | You want a new presentation around accepted references | Graphic drift and garment changes |
| New garment concept | You are exploring a visual direction | Whether the item is clearly a concept |
Recraft's official mockup page describes adding uploaded or generated artwork to a template or generated base, repositioning it and exporting. Mockey's help center describes placing designs on product templates alongside separate AI image tools. These provider descriptions help distinguish the workflows; we did not test either account for this study.
For the named template service and its plan boundaries, read our independent Mockey AI workflow guide.
Use a placement brief with fixed visual cues
Use the supplied blank ivory T-shirt photo as the garment reference and the transparent tiger illustration as the artwork reference. Center the complete graphic below the collar, keeping its proportions and leaving visible garment margin. Preserve the orange tiger pose, cobalt crescent, three ivory stars and coral foliage. Keep the shirt framing, collar, sleeves, seams, fabric color and terracotta background. Add subtle fabric integration without a rectangular background or new lettering.
This is the original requested direction for the referenced edit below. A request to preserve something is not proof it was preserved. Compare the returned design rather than copying the prompt into an acceptance statement.
In Clout Image and Video, choose an available image operation that supports the references you need and review its credit quote. For a product campaign, explore Marketing Studio. This guide does not claim a dedicated garment-template importer or identical controls to another mockup service.
Inspect the original blank and placement edit
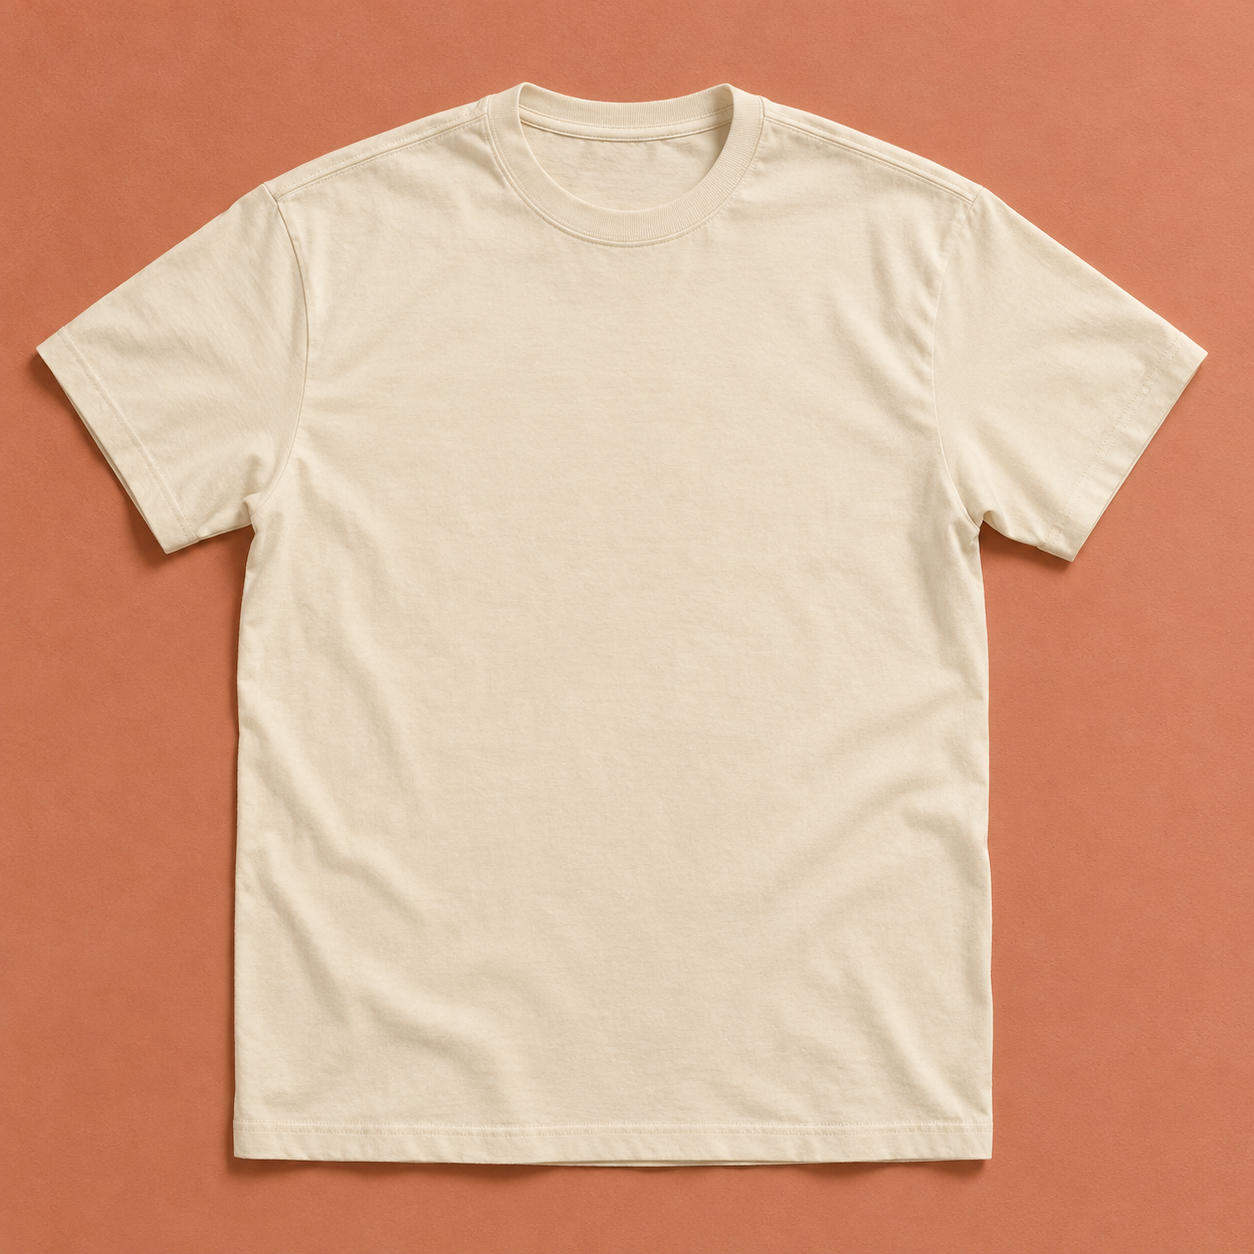
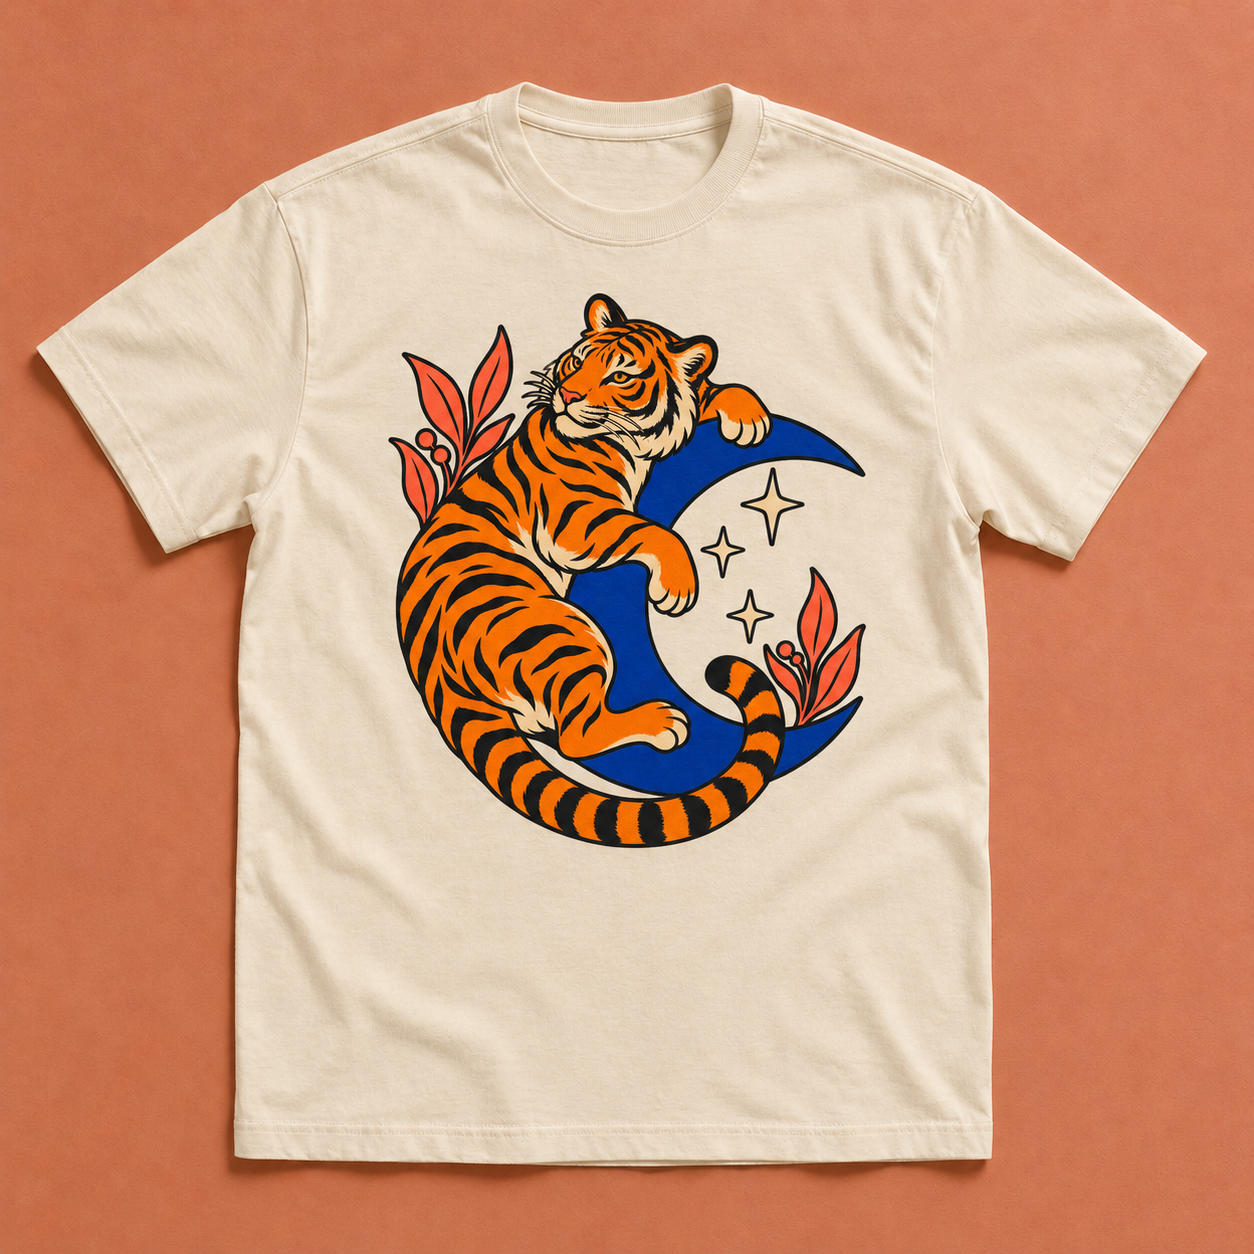
The returned edit shows the orange tiger, cobalt crescent, three stars and coral foliage centered on the shirt. The crew-neck, sleeve tips, hem and terracotta setting remain broadly recognizable. Fine stripe paths, facial linework and graphic proportions differ from the source artwork, so this is a recognizable placement interpretation rather than an exact reproduction. Both native garment images are 1254 by 1254 pixels. We did not measure physical print size, exact garment geometry or calibrated color.
Download the filled visual review and native-file record. Compare the images with the original transparent graphic. The separate designer-and-shirt cover is editorial artwork, not a second measured placement result.
Review the graphic before judging the scene
Check the illustration's pose, silhouette and number of major elements. Look at the crescent opening, star count, leaf shapes and tiger face. A scene can look excellent at thumbnail size while replacing small features in the print. Zoom into the delivered image and compare it with the actual artwork file.
Then inspect position. Is the graphic centered relative to the torso rather than the overall photo? Does it sit plausibly below the neckline? Are its edges clipped by a seam or hidden by a fold? Decide which visible differences are acceptable for an internal concept and which require a more controlled placement process.
Review the shirt and lighting separately
Compare the collar width, sleeve tips, bottom hem and visible fabric shade. Check the contact shadow and whether the print follows the surface. A dark halo, rigid rectangular edge or graphic floating above the fabric can weaken the presentation even if the artwork itself remains recognizable.
For color variants, use the actual approved garment references. Recoloring a mockup is not proof that a supplier offers that exact shade. For an on-model scene, separately inspect body proportions, fabric drape and the entire visible print. A generated fit is not a measurement of a real customer's size.
Keep promotional pixels separate from production size
A mockup image does not tell the printer how wide the graphic should be. Preserve the native artwork and prepare its placement against the selected product's actual requirements. Use the existing print-size planner for pixel-to-inch arithmetic, then confirm the file and placement with the responsible supplier.
Do not infer ink coverage, wash durability or fabric behavior from a generated scene. Review the production proof and any required physical sample before treating a concept as a faithful representation of the finished item. The study contains no physical print test, supplier approval or calibrated color measurement.
Prepare a useful campaign set after approval
Once the design and garment are accepted, plan a clear product view, a closer print detail and an appropriate lifestyle scene. Give each image a purpose rather than generating many unrelated backgrounds. Compare the garment and graphic across the set so the product does not change between an ad and its destination page.
For motion, begin from an accepted still and request a restrained supported action. Review the graphic throughout the returned clip for stretching, disappearing details and changing lettering. The fashion video workflow explains how to separate garment references from a motion brief.
Save a repeatable mockup packet
Download the blank mockup brief and record the artwork version, garment reference, placement target, chosen operation and review decision. Keep rejected outputs with a concise defect note so a later revision has a specific task.
The planning downloads are free. Clout image and video generation uses the displayed credit quote. This original study demonstrates one built-in referenced image edit, with the visible observations and limits recorded below; it is not a comparative provider-quality test.