An AI comic generator is useful when it helps turn a story into readable sequential art. The finished page needs more than attractive drawings: a clear panel order, recognizable characters, intentional dialogue and an export that stays readable at its destination. Start with a small complete scene so you can review all of those together.
Write a four-panel script before generating
Give each panel one visible story beat. For an original example, a courier carries a glowing seed to a rooftop greenhouse: arrival, discovery of a locked door, an improvised handoff, and the seed lighting the plants. The change between panels carries the story. Avoid asking one picture to show several successive actions.
Download the four-panel comic script template. It includes the fictional seed-delivery outline and columns for framing, dialogue, continuity and review. The outline is original planning material. The separate generated draft later in this guide shows one interpretation and its review limits. Replace the outline with your own scene before generating.
Make a horizontal four-panel comic strip
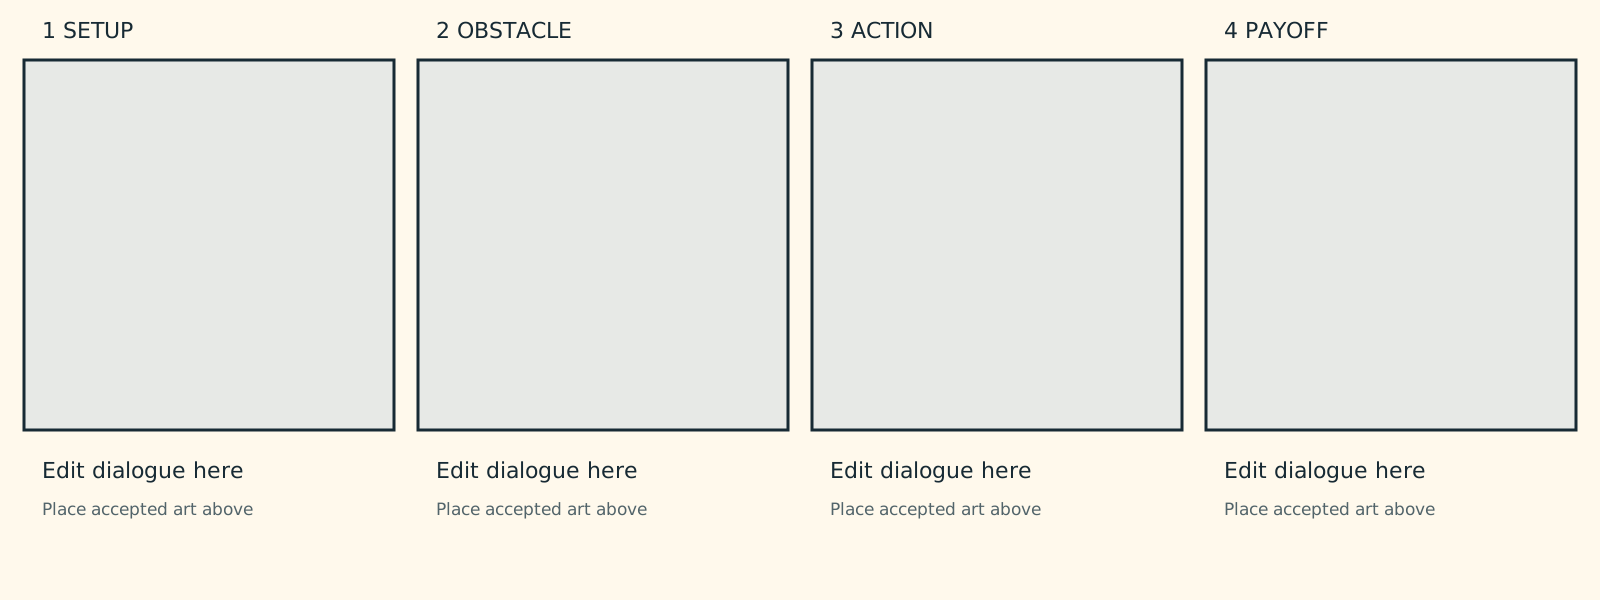
An AI comic strip generator workflow starts with a shorter reading unit than a whole comic book. For a left-to-right strip, plan setup, obstacle, action and payoff as four consecutive beats. Keep the same character and essential prop across the row. A strip can be readable without becoming a miniature page crowded with subpanels.
Download the editable four-panel strip layout and layout instructions. This original SVG contains four empty artwork rectangles and separate editable text fields. It is a local layout resource, not generated panel art or an automatic comic creation app. Replace each placeholder with accepted artwork in an SVG-capable editor and edit the text there.
| Destination | Layout decision | Review |
|---|---|---|
| Horizontal strip | One clear row with a left-to-right sequence | Can readers identify the turning point without zooming |
| Comic page | Rows and gutters that establish panel order | Do the eye path and dialogue order agree |
| Vertical scroll | Separate beats with deliberate scroll spacing | Does each reveal work at phone width |
The template is 1600 by 600 drawing units with a matching viewBox, not a verified print specification. Set the actual destination size and check lettering after placing your artwork. Rearrange the panels deliberately for another reading direction rather than mirroring completed lettering.
Build a compact character reference
Define the courier's face, hair, jacket, bag and seed capsule. Choose an approved portrait and full-body view when your image workflow supports references. Record fixed details beside the files. A repeated description can help the brief, but it does not guarantee that an image model preserves identity across panels.
Generate one character direction before a whole book. Compare the face, silhouette and distinctive accessories. If the bag changes sides or the seed capsule changes shape, fix the reference or scene before continuing. Keep accepted artwork separate from rejected variations so the next panel uses the intended source.
Choose page size and reading direction
Clip Studio Paint's comic creation guide recommends choosing canvas size for the intended print or publishing destination. Set your format before composing detailed artwork. A landscape strip, printed page and vertical scrolling comic have different framing needs.
For a western four-panel page, make the left-to-right and top-to-bottom sequence obvious. For right-to-left manga, plan that direction throughout the page and dialogue. Do not mirror finished lettering as a shortcut. Clip Studio's design guidance discusses panel composition and pacing; use a simple arrangement until the story reads clearly.
Generate panel art with one action per image
Original graphic novel panel, adult courier in a teal jacket with a small tan shoulder bag arriving at a rooftop greenhouse at coral dusk. The courier holds a glass capsule containing one glowing golden seed. Medium-wide framing, expressive ink contours and warm paper texture. Leave clear space above for dialogue added later. No lettering, logos or extra characters.
This original prompt proposes the opening shot. For the next panel, name the same approved character and capsule references, change only the camera and action needed for the story, and inspect the returned result. Avoid changing wardrobe, weather and art direction while also asking for a difficult pose.
Clout Image and Video can supply source imagery through the currently available image operations. Review the selected model's reference support and quote before submitting. Assemble accepted panels and editable text in a suitable layout editor; this guide does not claim an automatic Clout comic-page export feature.
Keep speech bubbles and lettering editable
Reserve dialogue space while composing the panel. Add approved words as text layers after selecting the artwork. Clip Studio's text and balloon tools are one documented finishing route. Check the chosen font's license and language support before delivery.
Use short dialogue that advances the visible scene. Place bubbles in the intended reading order and aim each tail at the correct speaker. Inspect overlaps with faces, hands and important props. A beautiful image with an ambiguous speaker or unreadable line still needs revision.
Review continuity across the whole page
Place all four panels together before approving individual details. Check character proportions, the seed's color, bag placement, time of day and the greenhouse layout. Decide whether a changed camera angle explains a difference or whether the object itself has drifted. Keep a note for each correction rather than regenerating the whole page without a specific reason.
Read the page without dialogue first. The action should remain understandable. Then read only the dialogue and check that it adds information rather than describing every visible movement. Ask a reader unfamiliar with the script to follow the panel order and identify the turning point.
Adapt the workflow for AI manga
Manga is a storytelling format with many visual approaches, not simply a monochrome filter. Plan reading direction, pacing, screen tones, character expressions and line contrast deliberately. Use original characters and a consistent visual brief. Generate separate panel artwork when a complete-page attempt makes layout or identity difficult to control.
For a black-and-white delivery, review the exported values at the final size. Heavy tone or tiny crosshatching can obscure faces and dialogue. A vertical comic needs its own spacing and pauses; stretching a printed page into a long image rarely preserves the intended reading experience.
Inspect an original four-panel manga draft
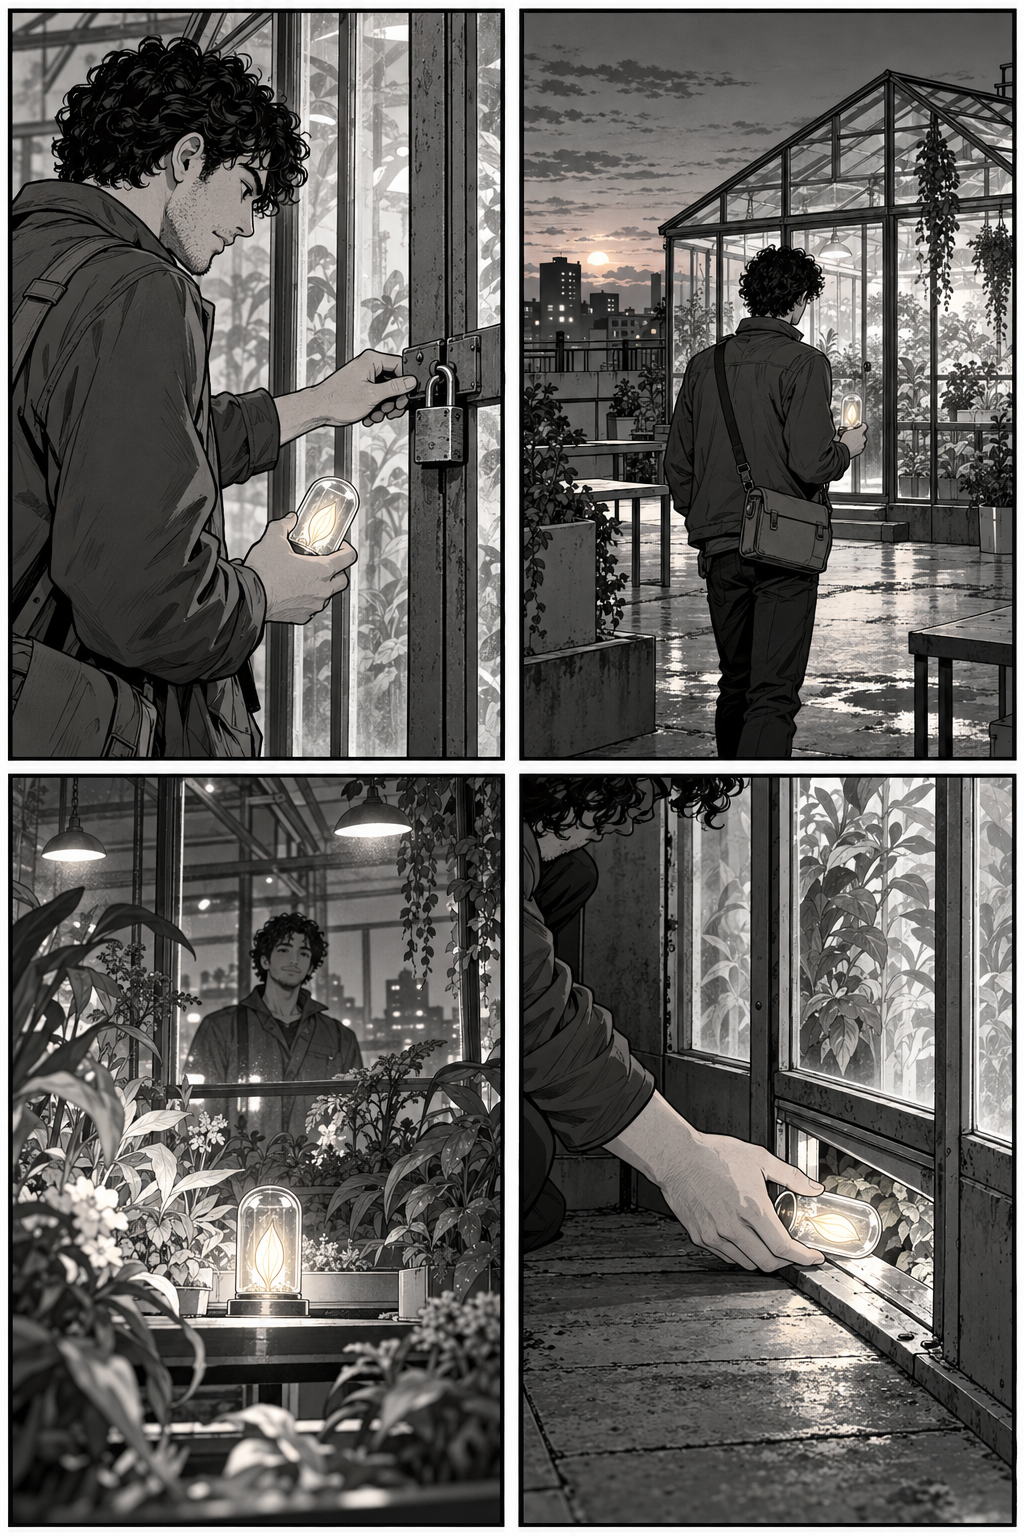
Download the native 1024 by 1536 PNG, generation brief, observed panel review and file record. This separate built-in imagegen example uses the original seed-delivery outline. It is a flattened raster draft with no editable lettering or panel layers.
Read the top-right arrival, top-left padlock, bottom-right handoff and bottom-left payoff. The result has four visible panels with clear gutters, a recurring curly-haired courier and luminous capsule. It is mostly grayscale with warm light accents, not strictly black and white.
The transfer at the lower opening is still ambiguous, and the capsule changes orientation between views. Those are useful review points, not defects hidden by calling the page finished. The courier's recurring appearance is a visual observation, not a measured identity-consistency score. The filled review CSV records this one output; use the original script template to plan your own scene.
Choose a composed page or separate panel workflow
Anifusion's help distinguishes a composed page image from separate panel images. It describes character profiles and reference support that depend on the selected model, plus editable text and bubbles in the comic editor. Its documentation states that export requires an active subscription. Check the current account and operation before relying on any of these controls.
A composed result can establish the overall rhythm quickly, but drawn frames remain part of the same image. Separate accepted panels make it easier to replace one weak beat during layout. We did not generate this example in Anifusion or benchmark its output. Keep the provider workflow description separate from our original downloaded draft.
For separate picture-book scenes, use our AI book illustration workflow and original two-moment study, which compares reference cues and actual file sizes before layout.
Export a page people can actually read
Check the platform's current size and format requirements. Review the exported file on a phone and at its intended print scale. Look for clipped bubbles, missing fonts, accidental transparent backgrounds, unreadable small text and artwork too close to trim boundaries. Keep the editable project as well as the final image or PDF.
Record attempts, accepted panels and finishing time. A single generated page is not cheaper if every bubble and face requires extensive repair. Start with one complete scene, keep the accepted references, and expand only when the art and layout workflow are repeatable. For moving story scenes, explore Clout AI Cinema and the storyboard guide.