

Sneaker photography needs to show the shoe clearly before it gives the campaign a mood. Start with a reliable whole-shoe view, then capture the construction, condition and angles a buyer needs. Use AI scene editing for art direction around an approved reference, and compare the delivered shoe with that reference before accepting it.
This guide includes an original fictional mustard canvas sneaker and an actual reference-based portrait scene edit. Download both native images, the executed brief, a filled comparison review and an editable shot plan. The example tests a visible scene change, not a real retail item, physical fit or an unseen view.
Plan sneaker photography around the image job
| Image job | What to make clear | What needs separate evidence |
|---|---|---|
| Product identification | Whole shoe, shape, colorway and visible construction | Exact item and variant being sold |
| Condition documentation | Actual wear, damage, marks and sole condition | Current photographs of the particular item |
| Material detail | Weave, seams, hardware and finish | Material composition from the product record |
| Campaign art direction | Setting, light, crop and space for copy | Product continuity after any edit |
| On-foot styling | Placement, silhouette and outfit context | Authorized wearing references and actual size |
Do not treat one dramatic hero shot as the entire product record. A secondhand pair needs truthful condition views. A new colorway needs its own correct reference. A concept shoe can explore a visual direction, but it cannot establish stock, materials or manufacturing quality.
Make a clean whole-shoe reference first
For a real pair, remove loose surface dust without hiding condition issues. Place the shoe on a stable surface and use a simple background. Start with broad light that makes the toe, panels and sidewall readable, then inspect glare on hardware and the contact shadow beneath the sole.
Keep the camera position consistent across the basic set. Leave enough margin to preserve the heel tab and toe bumper in the delivered crop. Record which shoe and variant you photographed so a later campaign scene cannot silently switch products.
Our source is a fictional generated sneaker rather than a photograph of a manufactured item. It has a mustard canvas upper, blue flat laces, five visible silver outer eyelets, an ivory rubber toe bumper and sole, a blue sidewall line and a teal heel tab. Those visible features give the later comparison specific things to inspect.
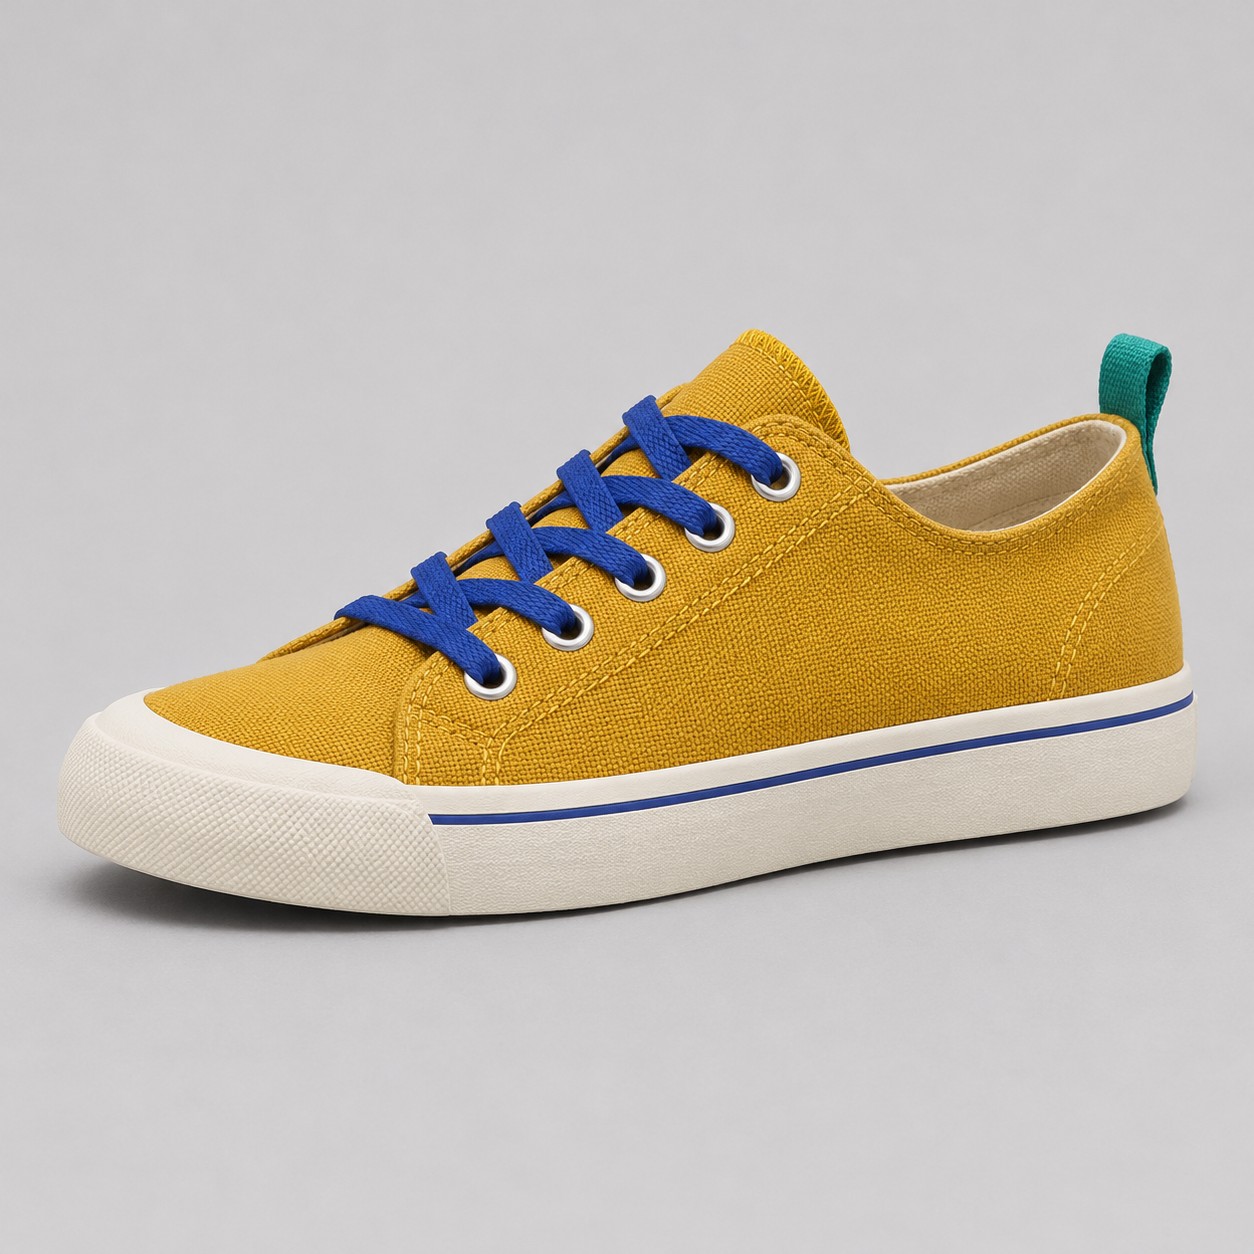
Download the native sneaker reference. This view does not show the outsole, hidden side, size label or a second matching shoe. Do not infer those details from the attractive side view.
Build a useful shoe product photography shot list
Capture the whole-shoe view, opposite side, top, rear, outsole and meaningful details from the actual item. Add a paired view when the customer is buying a pair. Use separate condition photographs when scuffs or wear affect the sale. For a campaign, plan an additional composition with space for text.
The free sneaker photography shot plan records each view, its purpose, the required source and the inspection task. Its study-status column explicitly separates the two supplied images from shots that still need to be captured. It is a planning worksheet, not a claim that all views have been generated.
One side photograph is not a verified source for the hidden outsole or interior. If the task is to show a real tread pattern, photograph that tread. If the task is to style the actual shoe on a person, use an appropriate authorized wearing reference and inspect size and placement separately.
Create a controlled AI campaign scene
Choose one change you can describe and evaluate. Our executed edit asks to keep the same visible shoe and camera view while changing the gray surroundings to a peach plinth and terracotta backdrop. It also requests portrait framing, with the shoe low in the image and room above for separately authored copy.
The brief identifies the parts that should stay recognizable: toe direction, panel construction, five visible outer eyelets, blue laces, ivory bumper, blue sole line and teal pull tab. It requests no generated text, added props or redesigned shoe. Download the actual scene brief and observation record before adapting it to your own product.
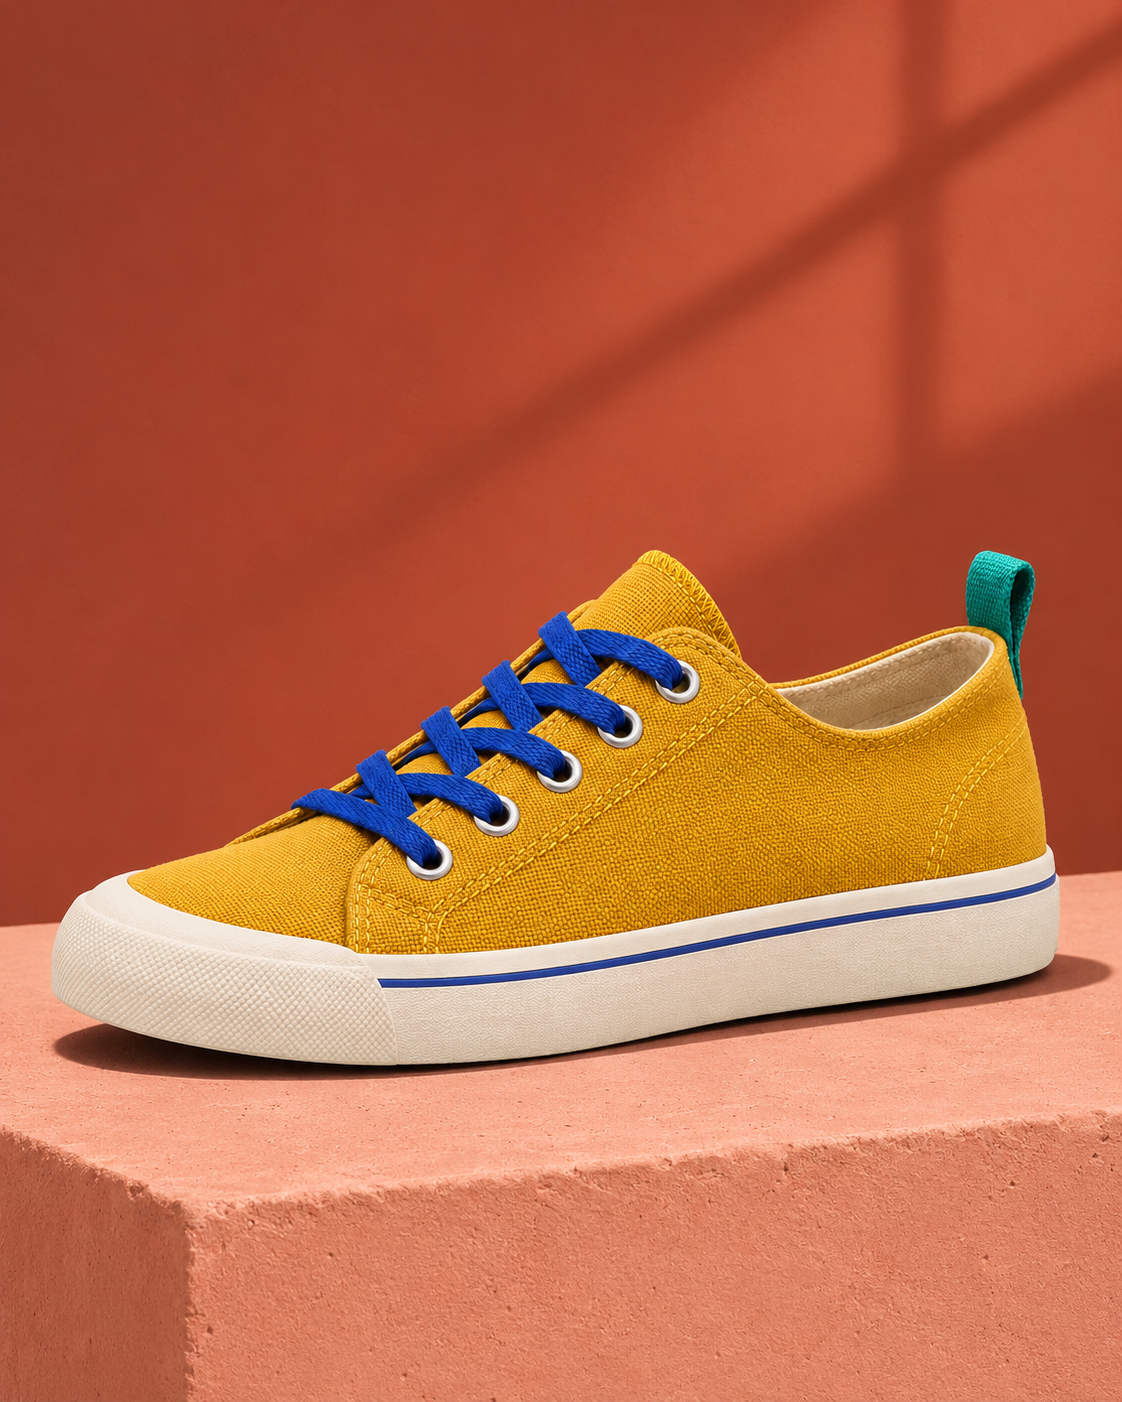
Download the native portrait edit. The new image is a real reference-based edit of the supplied fictional source. It is not an independently imagined second sneaker, a physical photoshoot or a Clout generation result.
Inspect the sneaker rather than only the background
| Feature | Observed result | Limit |
|---|---|---|
| Whole-shoe view | Toe remains left and heel right with one complete shoe visible | Camera geometry is not measured |
| Visible hardware | Five outer silver eyelets remain visible | The hidden eyelet row is not verified |
| Laces and tab | Blue flat laces and teal heel tab remain recognizable | Fine weave and shading differ |
| Toe and sidewall | Ivory bumper and blue sidewall line remain visible | No exact pixel or physical geometry claim |
| Canvas appearance | Mustard upper and broad seam layout remain recognizable | Microtexture, stitching and apparent warmth change |
| Composition | Portrait frame places the shoe low with upper room | Extra space is not a new product angle |
The brighter directional light makes the mustard look warmer, and the tiny fabric and stitch details are not identical. That may be useful for discussing a fictional campaign direction. It is not enough to approve an exact retail SKU. Compare the real item and its references when the output represents merchandise.
The filled sneaker comparison review records the observations and limits. The source record includes native dimensions and file hashes. These make the example inspectable without turning a single edit into a general model-quality claim.
Try three sneaker photography ideas with a clear purpose
Neutral construction study: use a quiet background and broad light to show the shoe as clearly as possible. Photograph each needed angle from the actual item. This is the foundation for judging a later scene change.
Color-block campaign: choose a backdrop that separates the upper, sole and laces. Reserve a calm area for a separately typeset headline. Our portrait edit uses this approach, with terracotta and peach around the mustard shoe.
Texture and condition detail: make a close view of the real canvas, seam, hardware or outsole. Use a stable camera and enough depth and light to read the intended detail. A generated closeup cannot establish the real fabric, a repaired seam or the condition of a used sole.
Keep ideas connected to a buyer question or an art-direction decision. Adding dramatic props, smoke and reflections can conceal the very parts the viewer needs to inspect. A colorful scene is most useful when the product remains legible.
Separate campaign covers from shopping-feed images
Google Merchant Center’s image-link guidance requires a clear view of the actual product and disallows promotional overlays on the main product image. It also describes additional and lifestyle images and requires AI-source metadata to remain in generated imagery. Check the current requirements for your destination before submitting a feed.
The bold cover on this article is editorial artwork, not a shopping-feed asset. Our fictional study images do not represent inventory. For a real listing, keep the exact variant, condition and product record accurate; a generated stand-in is not a substitute for identifying the item being sold.
Review exports at the size people will see
Inspect the native file for changed panels, missing hardware and unwanted marks, then preview the intended crop at its display size. Check that the toe, heel and meaningful detail remain visible. A portrait crop and a square catalog view may need separate compositions.
Keep your source image, edit brief and approval notes together. Preserve relevant original metadata when making downstream files. The native PNG downloads here are the original files copied into the site; smaller WebP cover images are separate editorial derivatives.
This study includes a square reference and a portrait edit, not a tested mobile ad, sales result, on-foot fitting or turntable video. For moving product scenes, use the AI product video workflow and review the full returned clip for changing construction.
Create the next footwear campaign in Clout
Bring your approved references to Clout Marketing Studio or a supported image workflow. Choose a focused scene change, check the available operation and quote, then review the actual output against the original shoe. The supplied example uses the built-in image tool and does not benchmark Clout’s models.
Use the broader AI product photography guide to plan an image set across product types. When the campaign moves into an announcement, the product launch video guide provides an editable finished sequence. Keep shoe identity and factual product information consistent across every format.


