An AI documentary generator can help turn research into a script, narration and visual sequence. The useful starting point is a question you can answer with evidence. Choose the facts first, decide what the audience needs to see, then use generation for the parts that benefit from illustration or performance.
This guide is about making an illustrated mini-documentary, rather than finding documentaries about artificial intelligence. It includes an original rainbow script, editable four-scene storyboard, claim ledger and shot plan. The package is a preproduction example, not a finished narrated film or a recording of a real weather event.
How to make a documentary with AI
- Choose one question and the intended audience
- Map each factual statement to a supporting source
- Write a short narration with clear limits
- Assign each shot a role such as evidence illustration or explanation
- Produce narration and visuals from the reviewed plan
- Set timing against the actual audio then check captions and the exported film
Keep these stages editable. If a source changes a claim, you should be able to change the sentence and its matching shot without rebuilding the entire project. An impressive opening image cannot repair an unsupported premise.
Choose a question small enough to answer
Our example asks why a rainbow appears after a shower. It covers the basic light process, the viewer's position and the circular shape. It does not attempt to explain every atmospheric optical effect or tell the history of optics. A narrow scope makes the source review manageable and gives each scene a purpose.
For a local business, a documentary might explain how one material becomes a finished product. For an educational channel, it might answer one science question. A personal profile needs the subject's real account and permission; generated narration should not invent their memories. Select a format that fits the material you can actually obtain.
Build a claim ledger before generating scenes
The NOAA NESDIS rainbow explainer supports the droplet process, viewing arrangement and circular shape. The USGS Water Science School explanation provides another institutional reference for water and light. These are explanatory sources, not measurements we made while producing this example.
The filled claim ledger records the sentence, source URL, supporting section, visual role and review status. Keep the exact source beside the draft. A bibliography at the end helps readers, but it is less useful during editing if you cannot tell which source supports which line.
Distinguish supported information from interpretation. If sources disagree, preserve that disagreement rather than asking a writing model to choose the most dramatic answer. Record dates and units where they matter, and verify a primary record when a general explainer is too broad for the claim.
Inspect the original mini-documentary storyboard
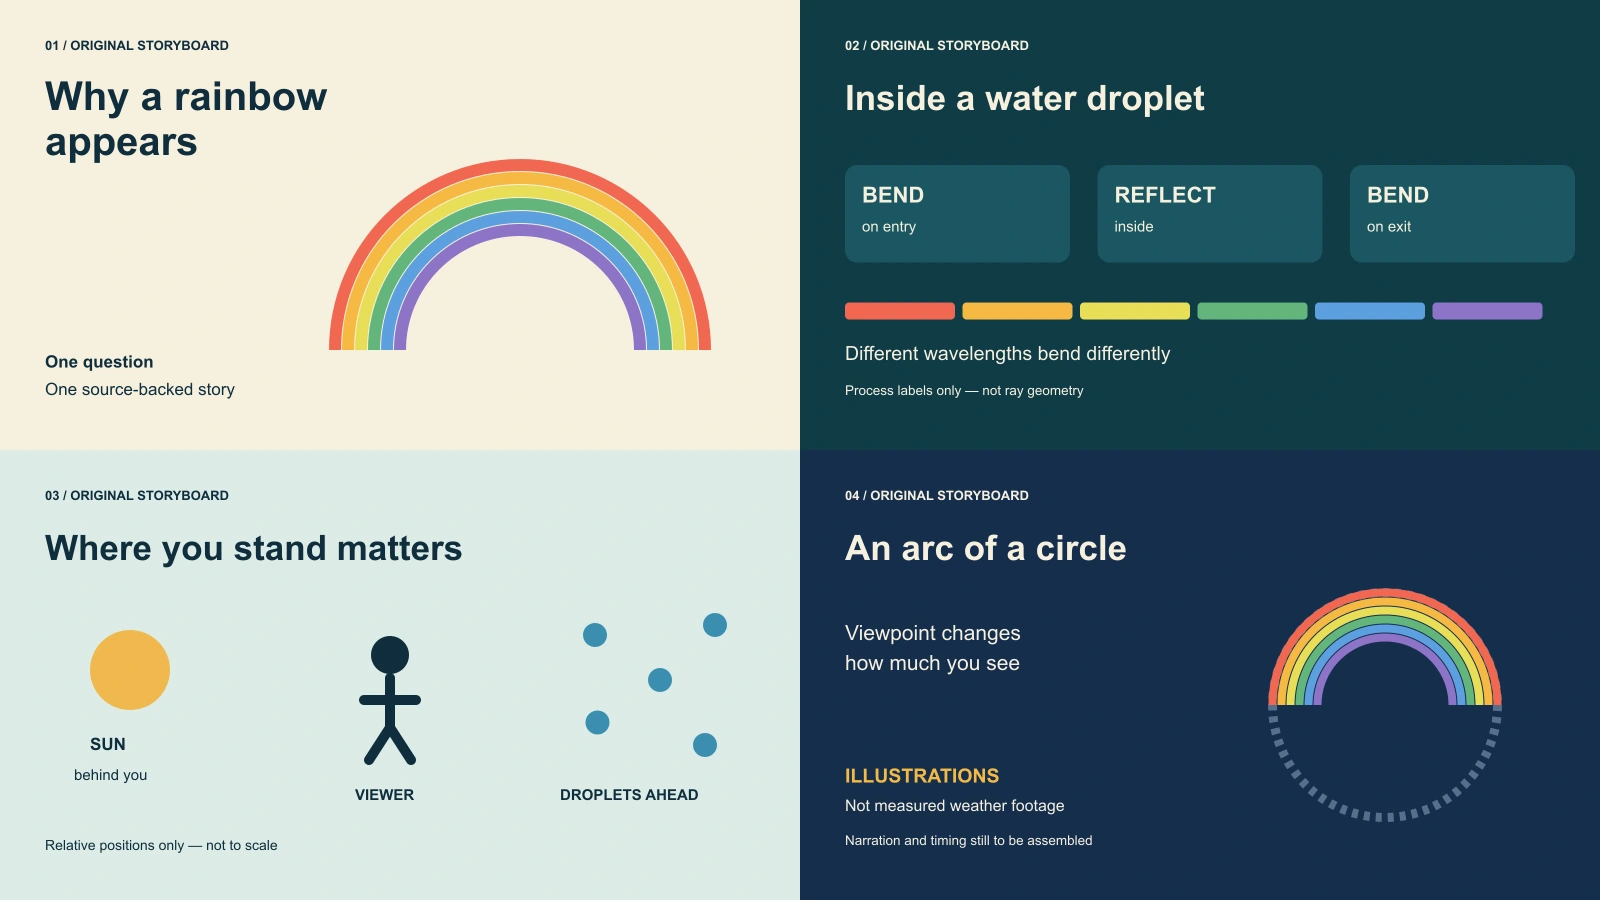
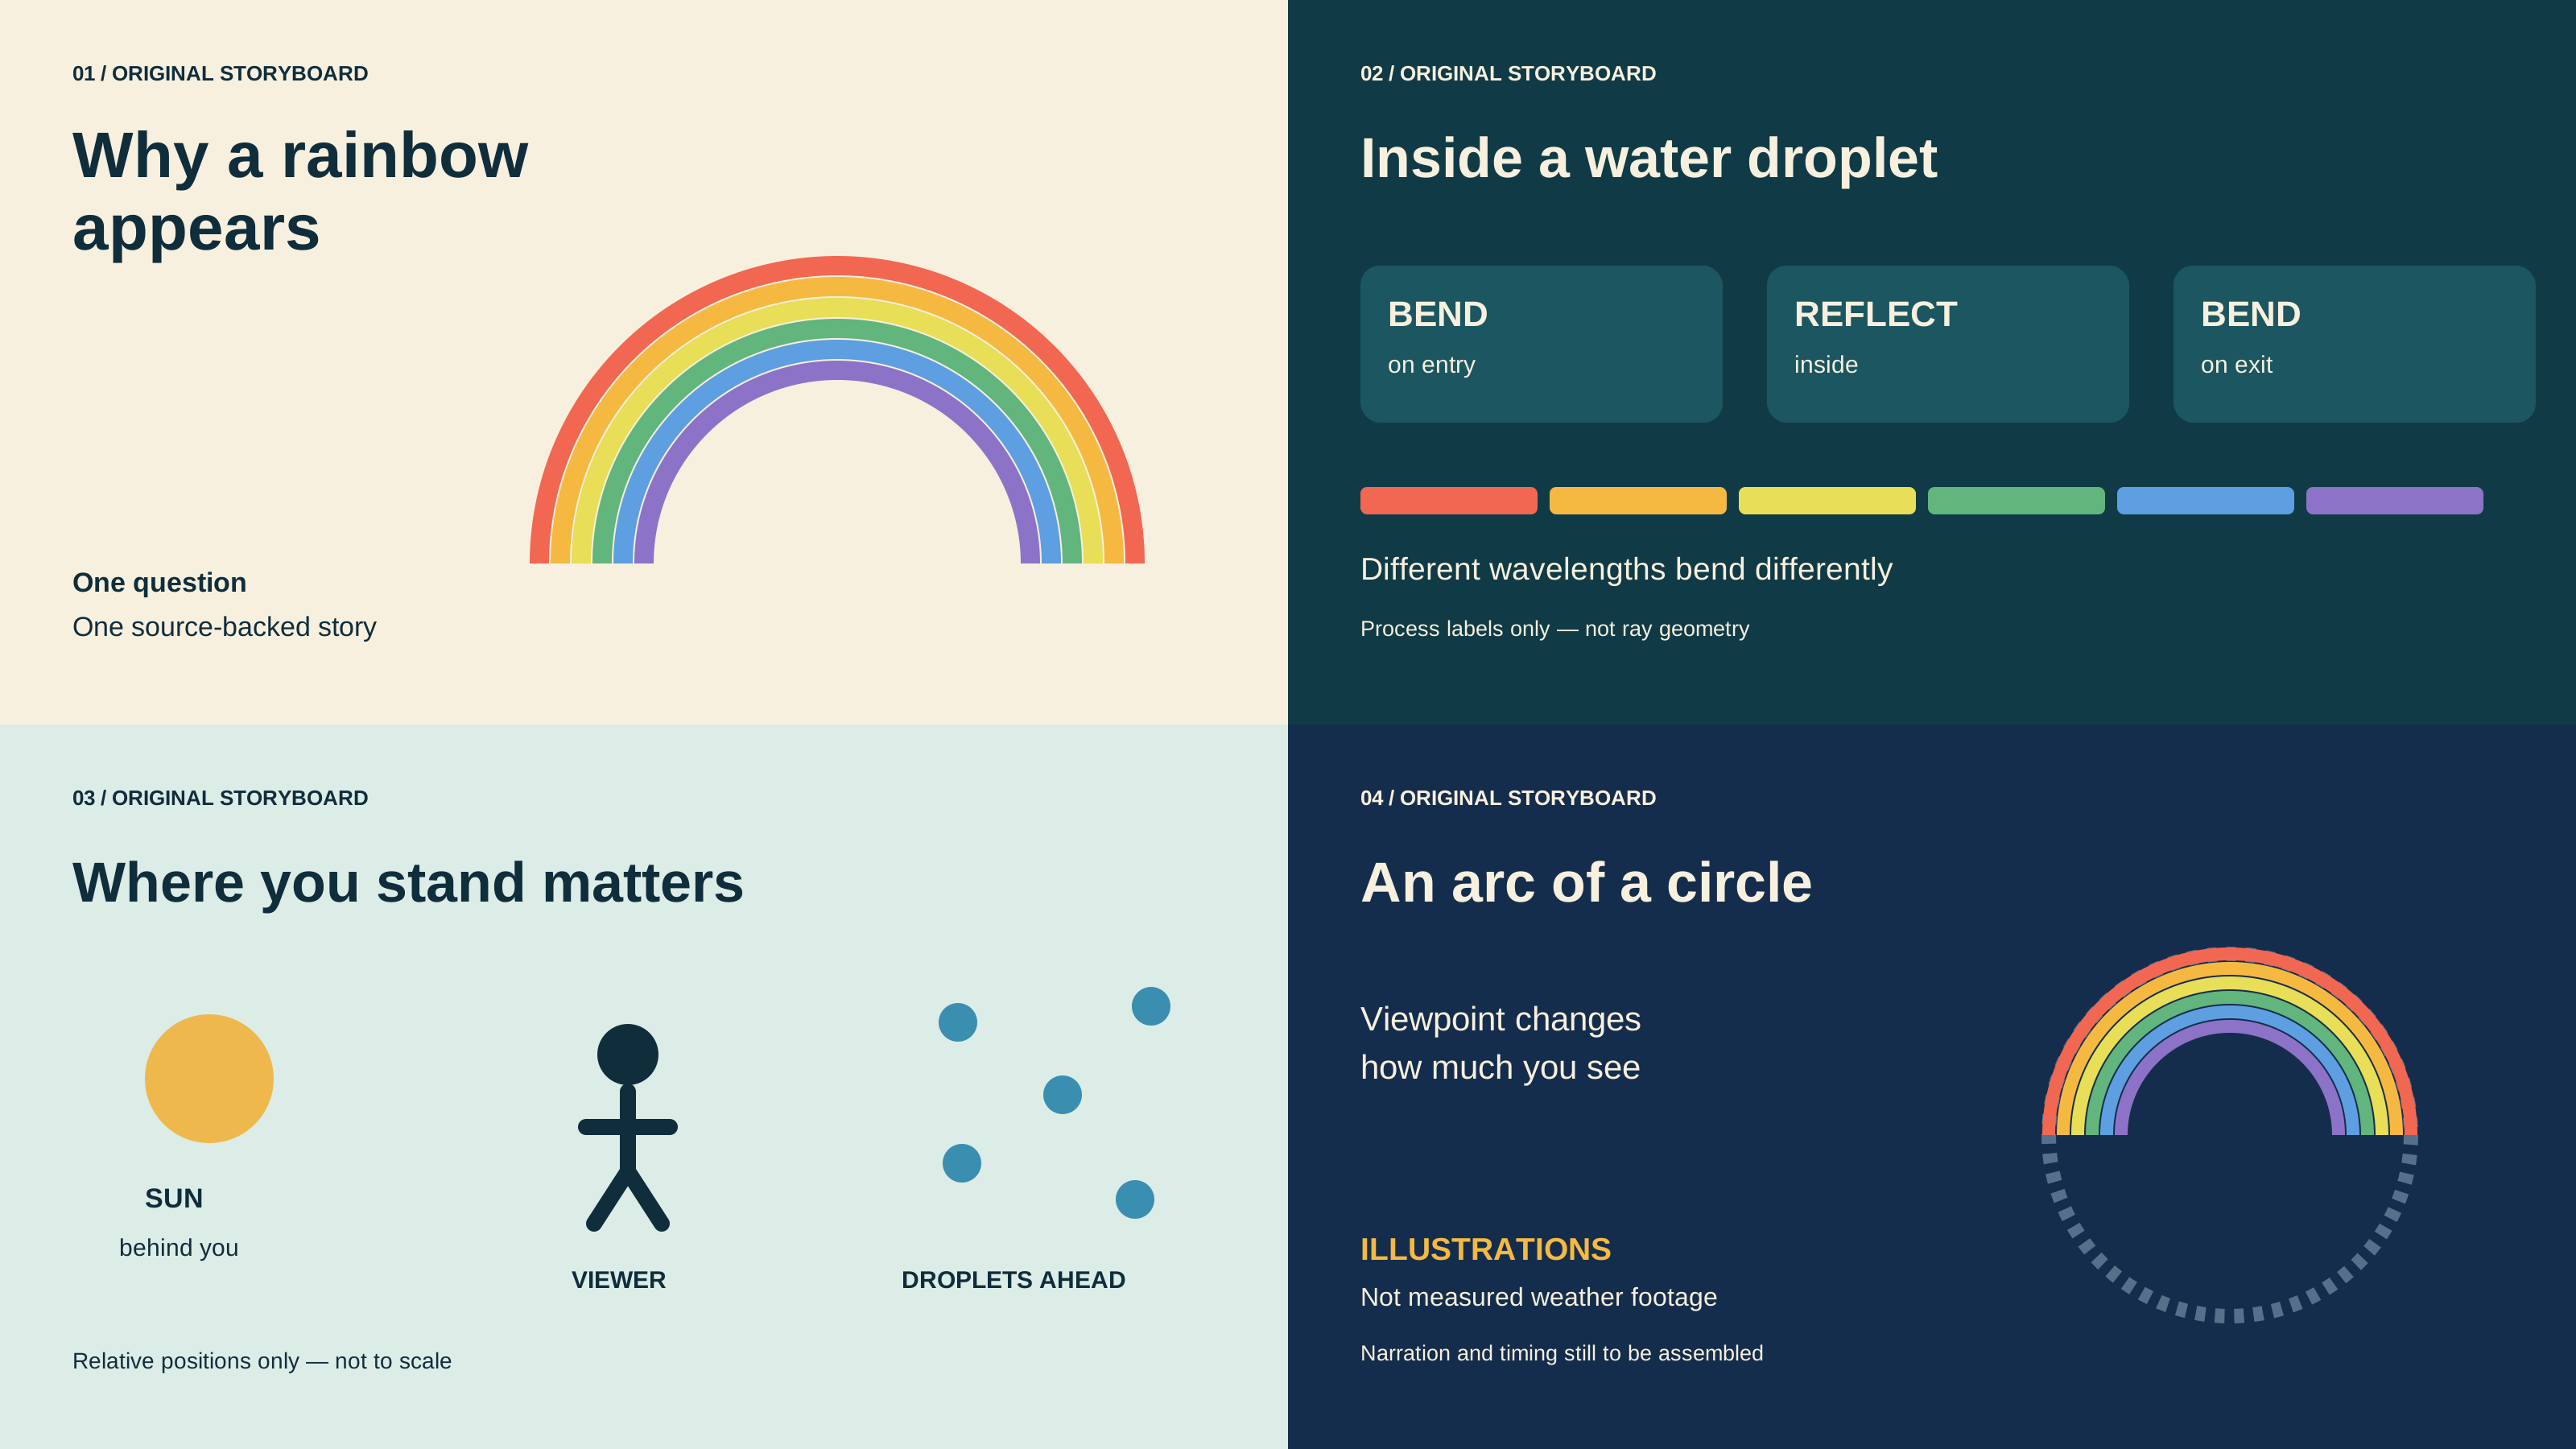
The first panel establishes the question. The second separates the process into labels rather than drawing a physically calibrated ray path. The third shows the relative positions of the Sun, viewer and droplets. The fourth introduces the circle and the illustration disclosure. Colors and shapes are authored design elements; their spacing is not a measurement.
Download the standalone editable SVG storyboard and asset provenance record. The SVG contains editable text and vector shapes. The WebP is a smaller presentation preview. Neither is a completed motion render, field recording or proof that a generative video model follows optical laws.
Write narration from the supported claims
Why does a rainbow appear after a shower? Sunlight enters water droplets, bends, reflects inside them, and bends again as it leaves. Different wavelengths bend by different amounts, spreading the light into colors. To see the bow, the Sun is behind you and sunlit droplets are in front. The familiar arc is part of a circle; the right viewpoint can reveal more of it. These graphics explain the idea. They are illustrations, not footage of a measured weather event.
This original draft paraphrases the source explanations. Download the script with source references. The package has no final voice track or synchronized captions. Runtime and caption timing must be set after the final narration is recorded or generated.
Read a draft aloud before rendering it. Remove repeated setup, unexplained jargon and claims that need more evidence than the runtime permits. Give a scientific term enough context to be understood. A slower sentence may be better than a fast sequence of facts the viewer cannot follow.
For choosing a consistent visual direction before generating scenes, use the AI moodboard reference workflow with an original still and filled review.
Give every visual an honest role
| Visual type | What it can show | What to record |
|---|---|---|
| Recorded footage | An actual observed scene | Creator date location permission and relevant context |
| Archive material | An existing historical record | Origin rights and the event it actually depicts |
| Generated illustration | A visual interpretation or imagined setting | Generation provenance and a clear illustrative role |
| Authored diagram | A simplified relationship or process | Source for the idea and limits of the simplification |
Use a generated landscape to establish mood when appropriate, but do not imply it records a particular storm. Keep labels separate when exact spelling matters. For a scientific diagram, an editable drawing can give better control over the relationship being explained than an unconstrained photorealistic image.
The photographic page cover is separate generated editorial artwork. No photographs from NOAA or USGS are reused in the production package. For archival event research, use the AI history video workflow, which has a different worked example and source ledger.
Turn the plan into a production workflow
The filled four-scene shot plan maps narration beats to claim IDs and visual choices. Timing fields say to set them after narration export. Do not treat a word-count estimate as the measured duration of a voice track.
Use Clout Faceless Studio when the intended format is a narrated story. Use Image and Video for supporting image or video assets, and AI Cinema for a sequence needing deliberate scene planning. Check the controls, supported inputs and credit quote for the operation you select. This example does not establish an automatic source-checking or scientific-simulation feature in Clout.
Generate one representative scene before producing the whole sequence. Confirm that its visual language fits the topic and that important details remain readable at the final aspect ratio. A diagram with useful labels in a landscape board may need a new layout for a vertical short.
Review narration captions and the actual export
After obtaining the final narration, align scene changes to its real pauses. Add captions from the delivered audio and check names, technical words and sentence breaks. Automatic transcription can help create a draft, but the original script and actual spoken words still need comparison.
Use the blank production review worksheet to record the file inspected, observed issue and release decision. Its observation fields are intentionally empty: it is a reusable checklist, not a claim that this package passed an audio or video review.
Watch the exported file from beginning to end, including the closing source or illustration note. Confirm that captions stay within the visible frame and that music does not obscure speech. Test the delivered page and media player after publishing; an editor preview is not the same artifact as the final upload.
What is free in this documentary maker guide
The original script, storyboard, claim ledger and planning downloads are free to inspect and reuse as workflow resources. They do not include unlimited AI generation, a finished documentary export or third-party subscriptions. The useful result is a traceable production plan you can adapt to your own evidence and audience.
For a fictional narrative rather than factual explanation, see the book trailer workflow. For combining several shots while retaining visual continuity, use the multi-shot video guide. Choose the format that fits the story and the evidence you have.