

A video text remover can help clean an outdated headline or baked-in caption from your own footage. Before choosing a tool, find out whether the words are a separate editable element or part of the picture. Removing a title layer preserves the untouched scene. Reconstructing pixels under flattened lettering is a harder operation that needs review in motion.
Start with your project file and original export if you have them. A clean master is usually a better starting point than an edited social download. Keep that master separate while you test a crop, a new caption version or a local repair.
Identify how the text was added
| Text type | First action | What to check |
|---|---|---|
| Editable title or caption layer | Disable or revise the layer in the original project | Export with the intended caption settings |
| Separate subtitle file or supported embedded track | Change the selected caption track or export configuration | Whether the actual picture still contains lettering |
| Words burned into the image | Use a clean master or test local reconstruction | Background continuity and damage to the subject |
| Text outside the important action | Compare a deliberate crop | Composition and final frame shape |
Try changing the player’s caption setting. If the words disappear, that display was using a separate caption track. If they remain, inspect the original editing project before concluding they are permanently flattened. A player toggle does not switch off title graphics that were exported into the picture.
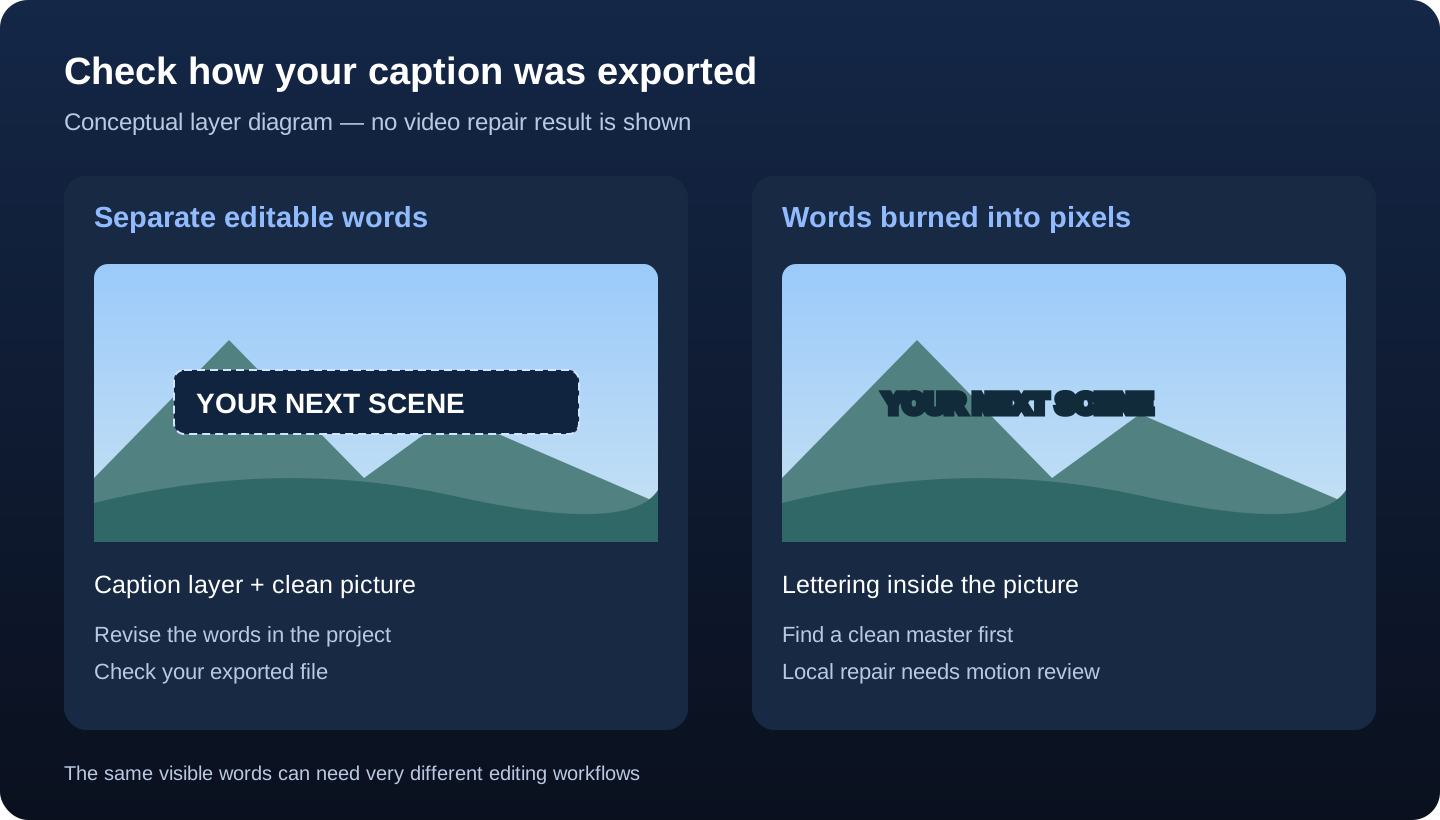
Download the caption layer diagram
The left panel represents editable words over a clean picture. The right represents lettering flattened into the picture. This conceptual illustration is not a before-and-after repair.
Recover a clean export before repairing pixels
Adobe’s caption export documentation distinguishes burn-in, sidecar and embedded outputs. That distinction matters when preparing several language versions or changing the design. Keep an approved picture master and the caption data separate when your delivery workflow supports it.
If you still have the project, duplicate the sequence and disable the unwanted graphics or caption layer. Export a short test with the intended settings. Watch that exported file in a separate player and compare its duration and audio with the accepted version. A clean preview inside the editor does not establish that the export omitted the lettering.
Remove a separate subtitle track for free
If your own video contains a separate subtitle stream, a local tool can omit that stream while retaining the picture. FFmpeg's official documentation describes stream mapping, optional maps and the subtitle-disable option. With FFmpeg installed, this example maps video and available audio into a new Matroska file without re-encoding them:
ffmpeg -i source.mkv -map 0:v -map '0:a?' -c copy -sn clean.mkvUse a new output filename and preserve your original. This command omits subtitle streams; it does not erase words already visible inside the picture. The output container is MKV, so check your intended player's support. For a platform that requires MP4, use a compatible export workflow and inspect that file separately. Local processing does not require uploading the clip or logging into a remover website.
Plan a repair for burned-in lettering
When there is no clean master, select a short segment containing the difficult moment. Include a pan, a hand passing behind the words or a change in the background texture. The easiest static frame gives too little evidence for deciding whether the full clip is repairable.
Mark the full letter shapes, including outlines and shadows. Keep the selection local to the unwanted wording. A wide box can remove the caption while also changing a face, product label or hand that crosses the same region. Compare the background immediately around the text before processing.

Download the native creator scene
The artwork illustrates a clean composition to preserve while revising your caption design. It is a generated still, not a video frame or proof of a text-removal result. The direct download retains the native 1536 by 1024 pixels.
Choose a fill method that fits the background
Adobe’s Content-Aware Fill guide documents creating a transparent region with a Subtract mask, selecting the analysis range and generating a fill layer. Its Object, Surface and Edge Blend methods address different backgrounds, and reference frames can guide difficult repairs. These are controls in that documented workflow, rather than evidence that every online remover exposes them.
For a moving shot, follow the lettering through the relevant frames and inspect where the performer crosses the repair. A simple background with visible neighboring texture gives a clearer target than text covering most of a face. If the area never appears unobstructed, a generated fill is an interpretation of unseen content.
Write a local text-removal brief
Remove only the outdated white caption across the upper part of this original home-studio clip, including its black outline. Rebuild the visible wall and shelf texture without changing the creator’s face, hands, coral cup, camera movement or daylight. Preserve the original duration and audio.
Use the tool’s brush, mask or tracked selection where supported. Written instructions identify the goal, but they do not replace checking which pixels the tool selected. Treat the sample as a production brief, not proof that a finished repair has already preserved every listed detail.
Review the whole repaired segment
Watch the exported repair at normal speed, then inspect the difficult frames. Look for remnants of outlines, crawling texture, smeared shelves, frozen background patches and damage where a hand crosses the lettering. Check the face and mug even if they were outside the intended selection.
Record the source and edited filenames in your review sheet. Keep the decision separate for picture continuity, audio timing and new captions. Accepting one attractive frame is not the same as accepting a sequence. If the repair damages the story’s important action, compare a cleaner source or a different edit instead of concealing the error with more text.
Download the text repair review sheet with six review areas and blank source, edited result, decision and revision fields. Fill it from your own exports. Keep the subtitle-stream decision separate from a background repair so you can tell which operation actually solved the problem.
Choose the best video text remover for your edit
Start with the operation rather than a brand ranking. The original editor is the first choice for a title layer you can still revise. Stream selection fits separate subtitles. A local fill workflow fits burned-in text only when it can reconstruct the background acceptably. Compare masks, tracking, reference support and export conditions for the repair you actually need.
For a scene with text over a moving face, test the most difficult crossing before approving the tool. For text over a plain wall, compare edge remnants and texture movement. This is an editorial selection method based on documented controls, rather than a hands-on quality leaderboard.
Compare free video text removers by the actual download
Check supported clip length, resolution, export conditions and retries before preparing a batch. Use the same source segment where supported and compare outputs that meet your review criteria. A free upload or preview does not establish that your final download has the needed detail or that a moving repair stayed consistent.
Keep replacement captions editable until the final export
Once the picture is accepted, add your new wording and check it against the spoken audio. Use short centered groups for vertical clips and leave room around complete letter shapes, including descenders. Recheck at phone size. Keep the clean master so another language or headline does not require repeating the repair.
Create your next original scene in Clout
Create original characters and video scenes in Clout with a clear action and camera direction. Finish the accepted picture before adding the final caption version. A clean source and separate caption plan make it easier to reuse a scene across messages and formats.


